This CE Center article is no longer eligible for receiving credits.
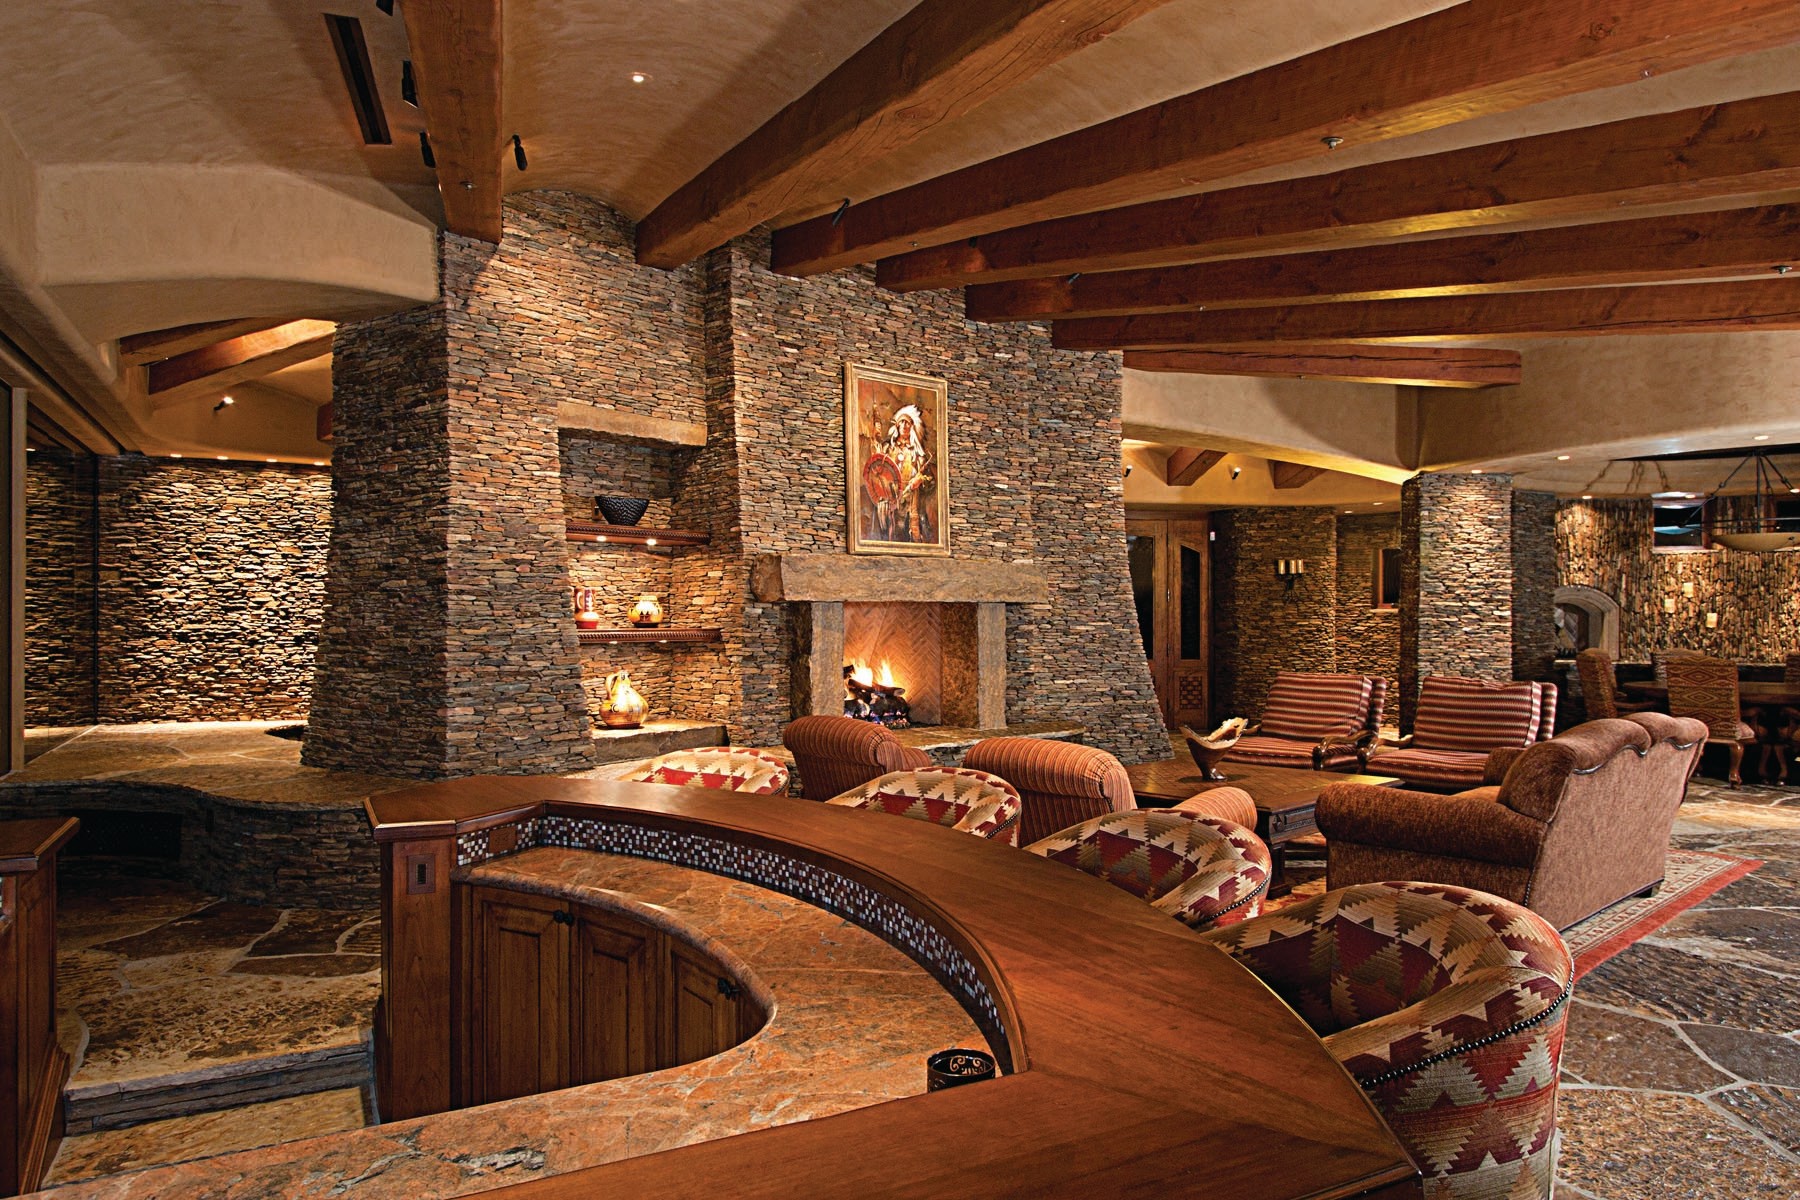
Photo courtesy of SPEC MIX
The use of the correct mortar for adhered veneers such as manufactured stone, thin natural stone, thin brick, or tile means that both interior and exterior designs will perform as intended.
It has become increasingly common for buildings to be constructed with lighter-weight materials, particularly on building exteriors. That means there has been a transition from heavier structural stone and masonry to lighter-weight structural systems using steel, reinforced concrete, or structural timber. There is still often a desire, however, for the look and durability of masonry. Accordingly, it is now more common that a thinner, lighter veneer of natural stone, manufactured stone veneers, or thin clay brick adhere to a substrate secured to the structure. In so doing, it becomes quite important that the correct mortar materials are used to adhere that veneer so it will remain in place over the life of the building without the threat of harm to people or requiring undue maintenance. This course takes a closer look at the choices for selecting and designing with adhered veneer mortars to achieve these desired outcomes.
Mortar and Grout Overview
Cementitious mortars have been widely used since the times of the ancient Greek and Roman Empires and have remained a fundamental building material in the 2,000+ years since. Mortars are mixed materials made up of several basic ingredients. Cement (i.e., Portland Cement, Masonry Cement, Mortar Cement, etc.) is used for bonding, strength, and durability. Hydrated Lime is used for workability and water retention. Appropriately graded aggregates that generally constitute a majority of the mix are used for bulk and body, strength, and shrinkage resistance. There may also be some admixture ingredients added to address specific performance enhancements for an installation. Water is added in an appropriate amount to mix these ingredients together and initiate a chemical reaction that bonds everything together, including the bonding of masonry or stone materials.
While the formulations and mixes of the ingredients have varied somewhat in different times and places, the essential uses have remained fundamentally the same. In structural applications, mortar is used to hold stacked structural masonry (CMU, brick, stone, etc.) in place and contribute to the structural stability of the assembly. Generally, the mortar has less compressive strength than the units being held in place depending on the ratio of different ingredients and their specific characteristics. Regardless, such structural mortar has been the fundamental basis of the design and construction of buildings that use stone, brick, and other masonry products for structural walls.
Mortar is also used in non-structural applications to adhere thinner products (i.e., thin stone, masonry, tile, or manufactured concrete products) to the surface of a structural system that is already in place. An additional material may or may not be provided to create a smooth substrate (cementitious scratch coat, cement board, etc.) before the surface products are applied. The applied, thinner surface products are referred to as a veneer in this case and the mortar serves to adhere the veneer to the prepared substrate.
Pointing Mortar, sometimes referred to as joint grout are terms used for mortar that serves as a finishing material. Rather than using it to adhere materials together, it is primarily used to fill gaps, joints or other separations of thin masonry units. Its purpose is generally to seal the openings and create a more uniform surface that not only looks more finished, it also helps to keep out weather, dirt, debris, and other things that are less than desirable in construction.
For purposes of this course, we focus on the adhered application of thin masonry veneer which has become increasingly more common in design and construction compared to structural, heavier load, applications. In this context, there are three ways mortar is used in veneer applications:
- Scratch coat: Before a thin veneer material can be applied to a wall, a layer of mortar that is textured with a trowel (i.e., “scratch” the surface) may be applied evenly over the substrate, particularly if that substrate surface is at all irregular or uneven. Many veneer products require a metal lath to be incorporated as part of the substrate, so the scratch coat is commonly installed over that and any fasteners that hold it in place. This all makes it easier, in many cases, for the thin veneer to be applied properly once the scratch coat is solidified.
- Bond coat: Whether a scratch coat is needed or not, the veneer material needs to be bonded to the prepared surface with an appropriate mortar. This bond coat may be applied directly to the wall or applied onto the back side of each piece of veneer material and pressed into place.
- Pointing mortar: Some mixes are also designed and specified, with or without colorant, to be used for filling the gaps or joints between the thin masonry veneer units. This mortar is intended to fill all the gaps and seal the surface of the wall where it is being applied.
Each of these types of mortars can have variations in the way that they are mixed and the ratio of the different ingredients used to suit the needs of residential and commercial construction.
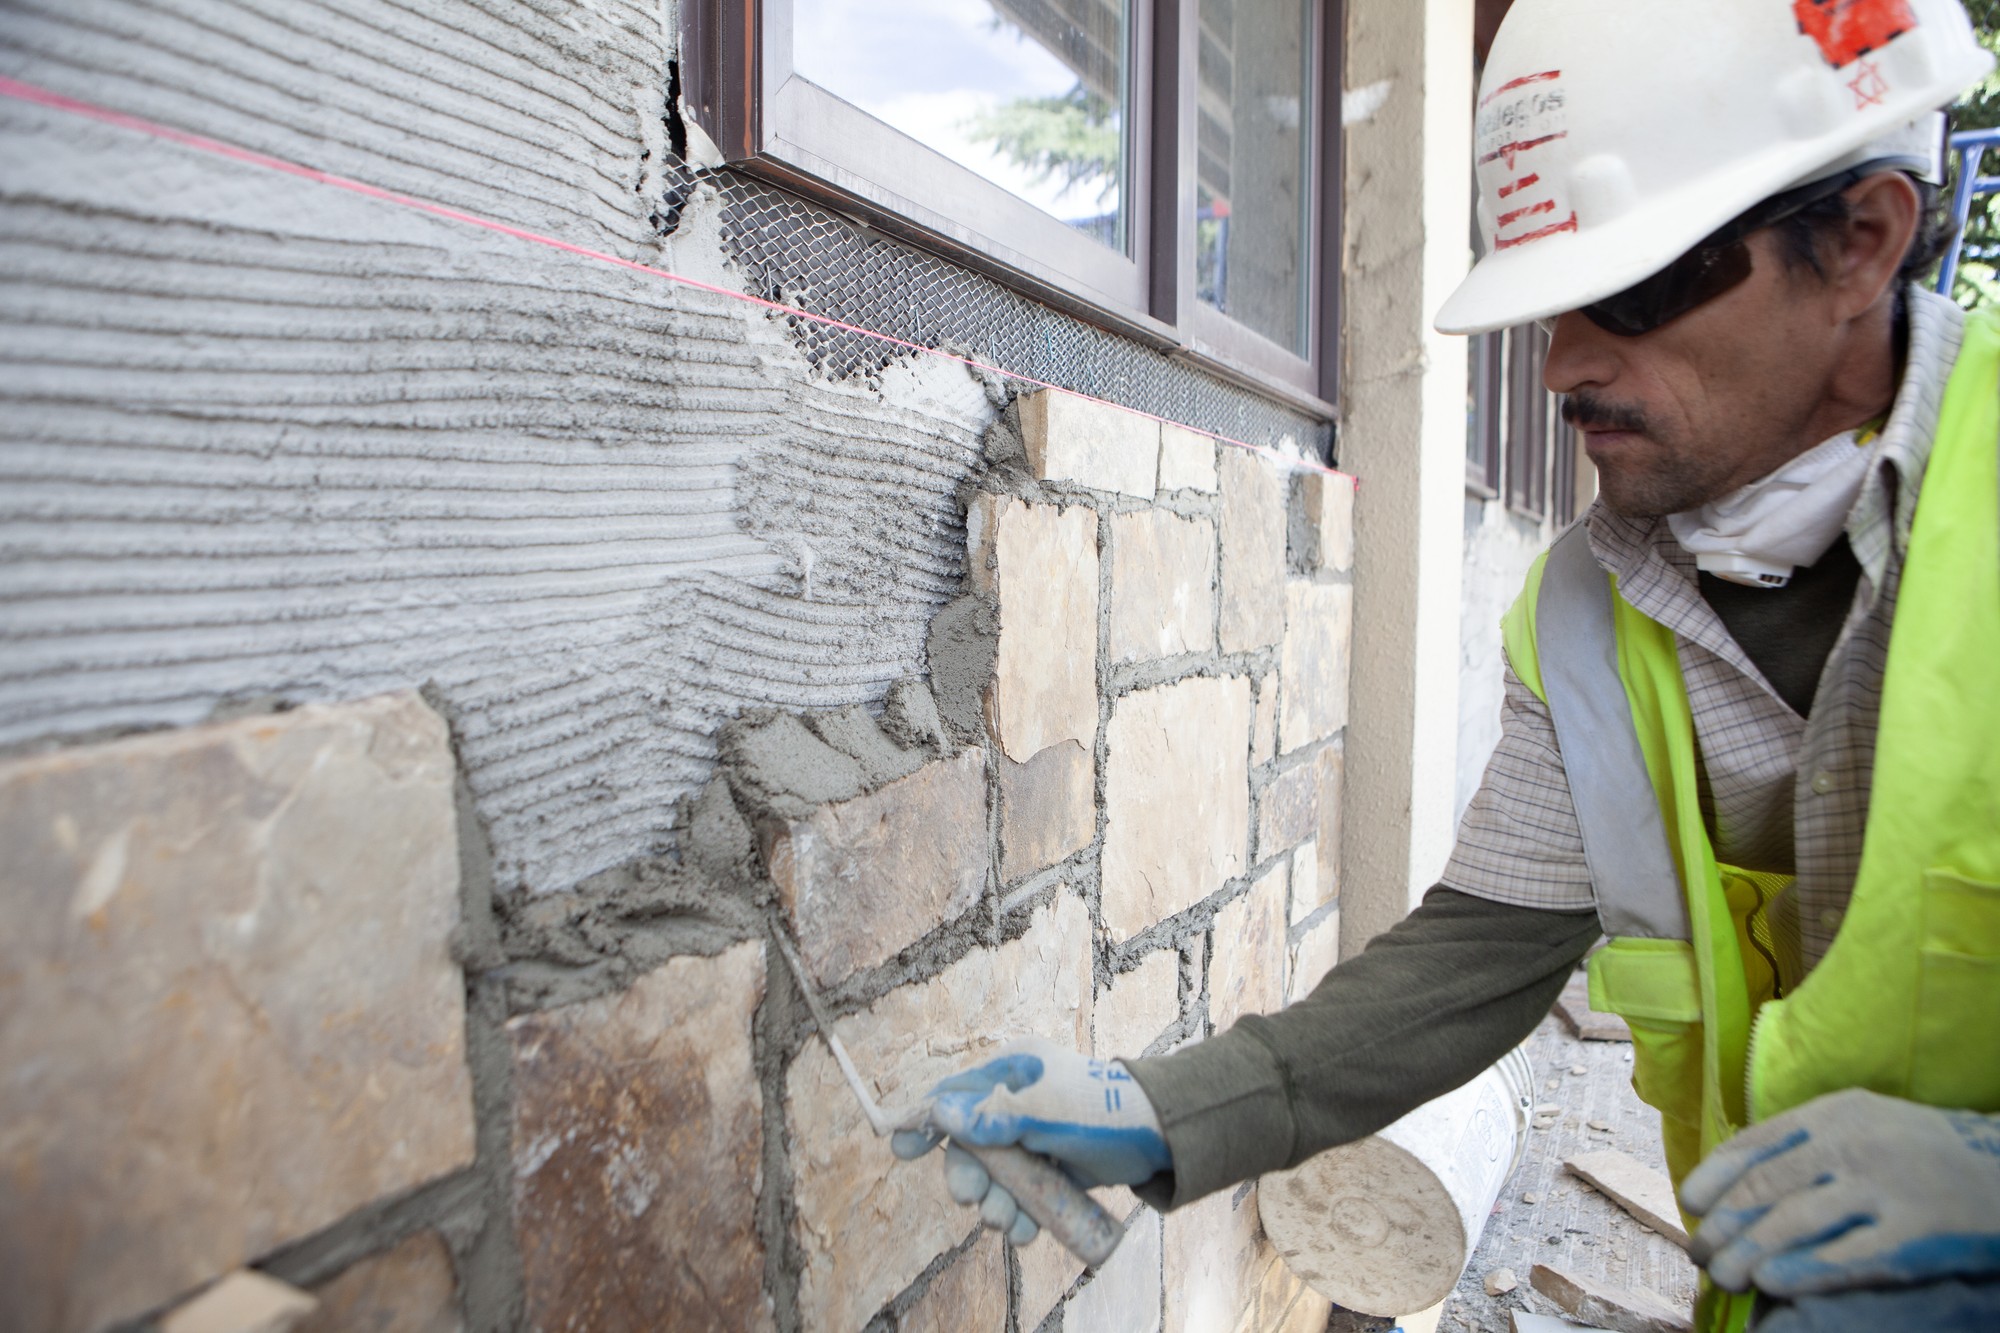
Photo courtesy of SPEC MIX
Mortar is needed for a scratch coat to prepare the substrate and for a bond coat to adhere the veneer product to the wall.
MORTAR MIXING
As already noted, mortars of all types require proper proportioning and mixing of the basic ingredients to produce the needed type of material. For best results, it is imperative that the proper ratios of each ingredient are maintained, or else different results may occur in terms of strength, durability, and general performance.
Site-Mixed Mortar
The traditional means to mix mortar ingredients has been to have bulk materials delivered to the construction site and shoveled by hand into a mechanical mixer. There are some obvious limitations to this approach since the mixing is completely dependent on the skill and understanding of the field worker(s) carrying out that mixing. Those hired to do the mixing may not be the most skilled workers, rather they are often the newest or youngest workers who are overseen by others who are focused on other tasks. Regardless, the quality of the mortar is dependent on the proper mixing of ingredients which also needs to be consistent between batches across an entire workday and project. This can be compromised by the fact that hand mixing is truly tiring work with heavy lifting, twisting, and turning all required.
Beyond the human factors, the outdoor conditions where mortar is mixed can have a significant impact on the quality. The ingredients, first and foremost, need to be protected from weather, which is commonly achieved with tarps over materials placed on the ground, particularly for sand. However, that doesn’t address airborne water vapor which can increase the moisture content of the sand beyond desirable levels or the moisture content of the sand when delivered to the jobsite from the supplier where it is not protected and often washed with water in the production process. It is also quite possible that ingredients placed on the ground can become readily contaminated with dirt or salts—things that can damage the mortar and contribute to unwanted efflorescence on the face of the finished product. Efflorescence is known to occur when water is present in the wall system, soluble salts are in the mortar or the masonry/stone/concrete units, and static pressure is present causing the water to migrate through the units and bring the salts to the surface. The storage of sand and other mortar ingredients on the ground for mixing can’t guarantee that soluble salts won’t contaminate the mix and later cause efflorescence or staining of the surface.In short, very strict quality control on the storage and protection of the ingredients is equally as important as quality control of the people doing the mixing and preparation of the mortar.
Pre-Mixed Mortar
The preferred alternative to site-mixing is to have mortars preblended in controlled conditions in a factory. Factory preblended masonry mortars eliminate most of the quality control issues and inconsistencies related to both worker skills and outdoor conditions. That’s because the mixing is carefully controlled using computerized equipment that measures the weight and volume of each of the ingredients to be sure the proportions are correct for the intended type of mortar being produced. By storing the ingredients either inside a factory or weather-tight silos, site conditions, weather, moisture issues, and efflorescence-causing soluble salts are controlled or eliminated.
Overall, the pre-blended mortar follows a tightly controlled mixing process meaning that the end products can be very consistent from one batch to the next and can be readily replicated if more is needed at a later time. This consistency applies not only to the makeup and performance qualities of the mortar but also to the color—clear concern if it is visible in the final form either as a grout or exposed mortar joint. Once the desired quantity is mixed, it is bagged in weather-resistant packaging and shipped to the construction site. Bag sizes can be anywhere from 50 pounds to 3,000 pounds for efficiency. Once delivered, the appropriate amount of water and final mixing is all that is needed for it to be ready to use.
Factory preblended mortars can be selected from standard offerings or custom-designed and produced to match or meet nearly any color or performance requirement specified. The cost for factory preblended masonry mortars and grouts can vary but are often ultimately the same (or sometimes more cost-effective) as jobsite mixed materials due to increased yield from the materials used and real on-site labor savings. The biggest benefits of preblended products overall, however, are greatly improved quality control and consistency across a project, i.e., truly meeting the specifications. Masons appreciate consistency since that makes their work look and perform better while making it easier to use than site-mixed products.
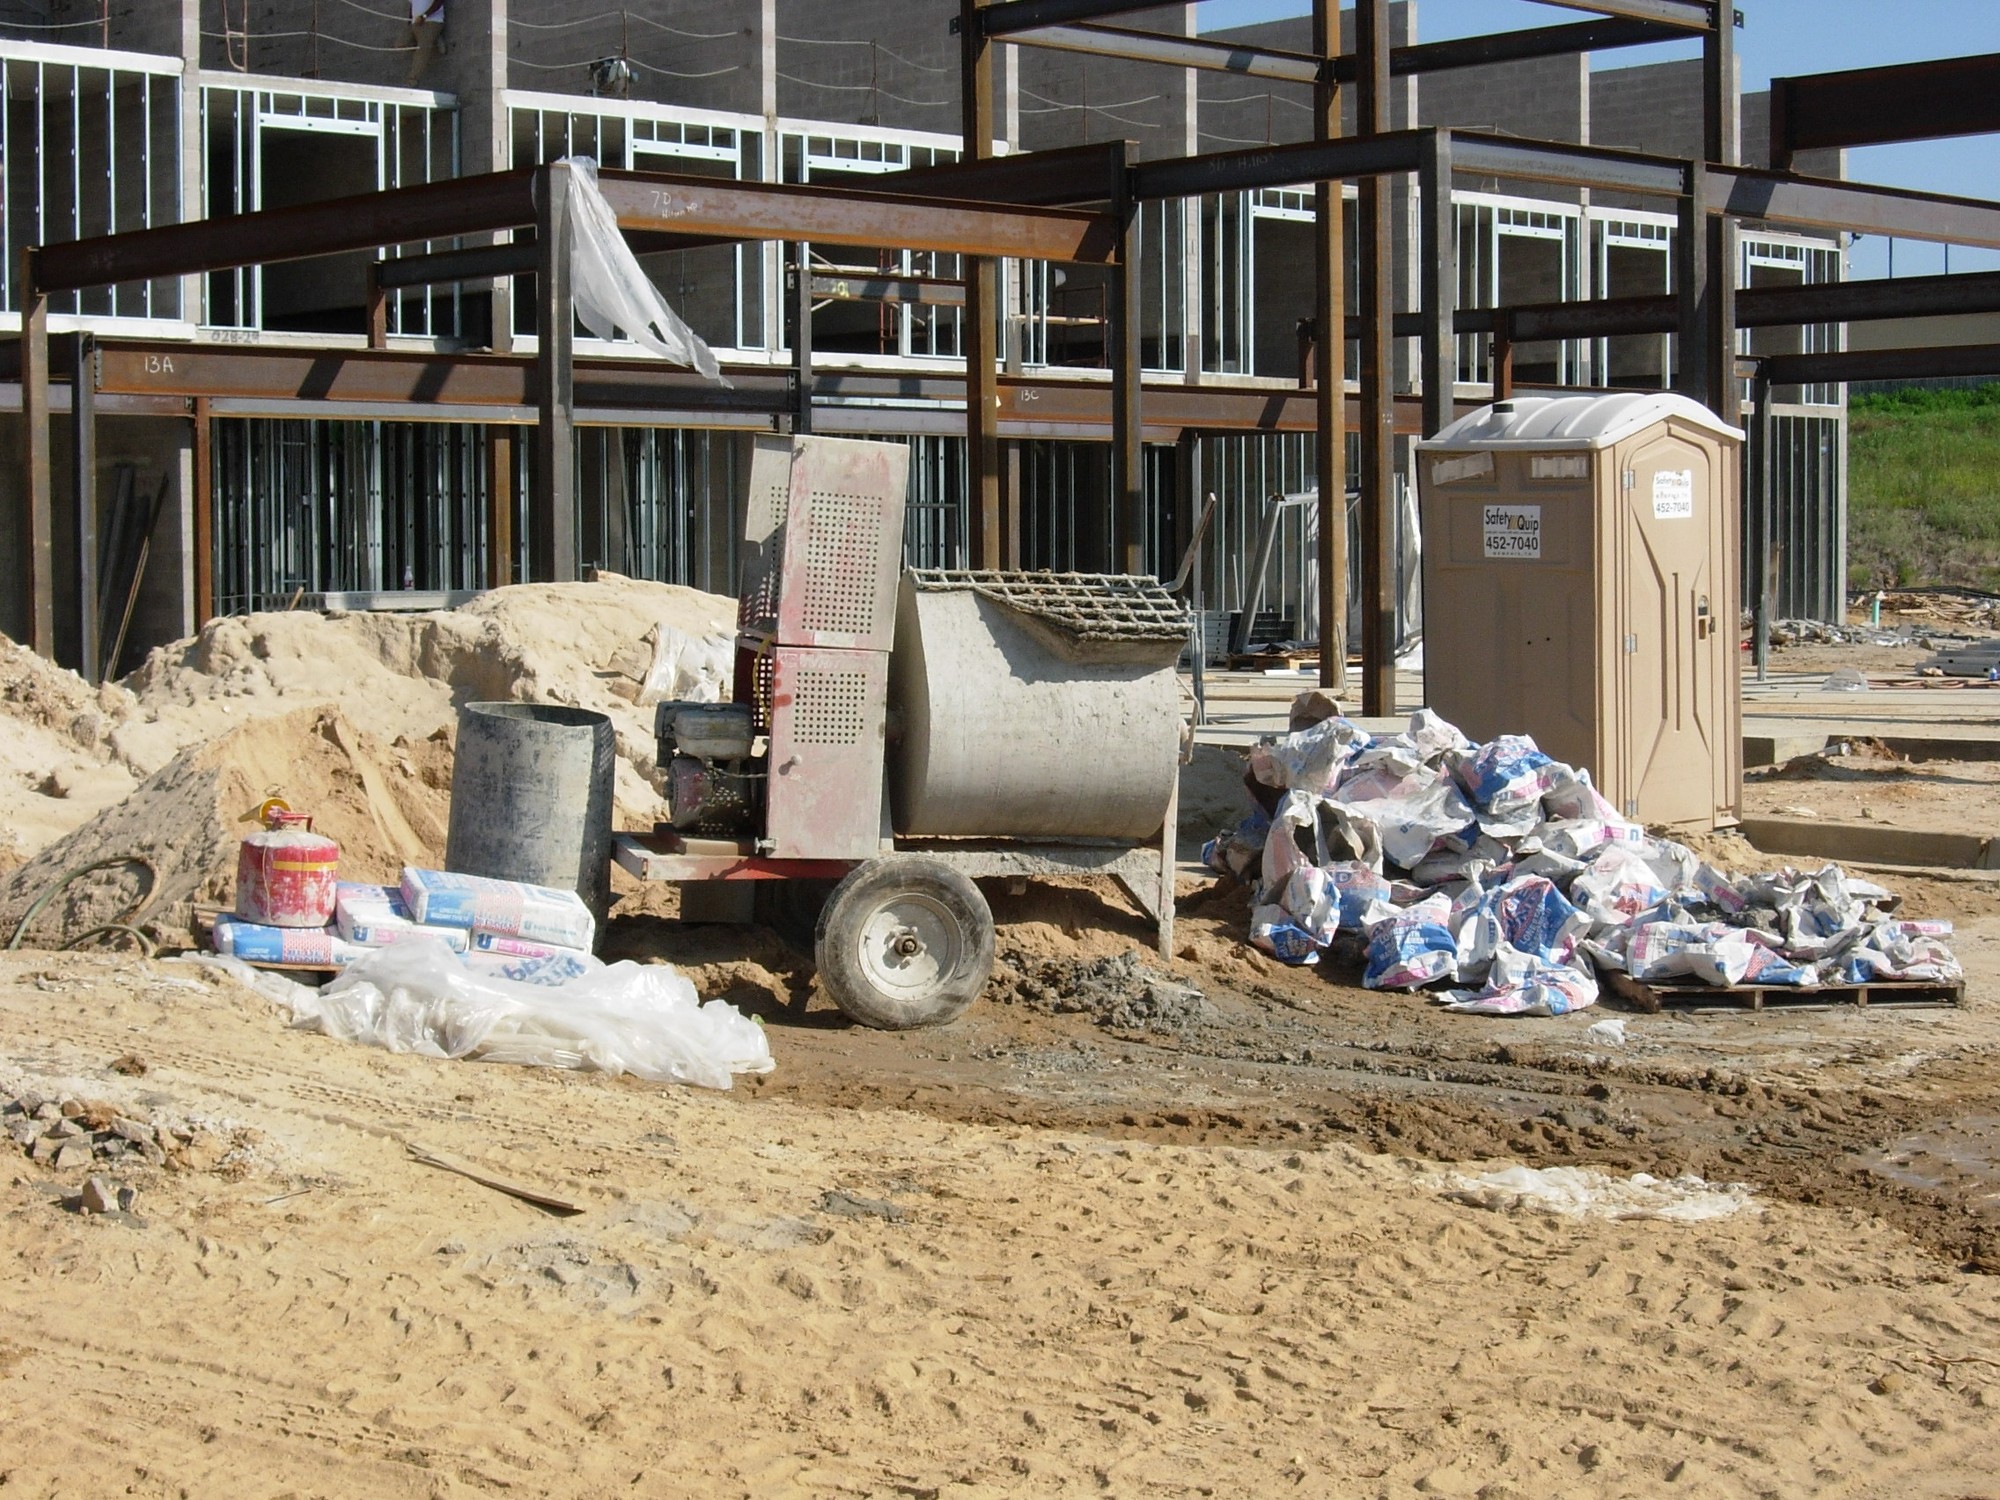
Photo courtesy of SPEC MIX
There are two ways to make mortar—field mixed outside on a jobsite with local labor or preblended in a factory with skilled workers and computerized equipment for complete quality control.
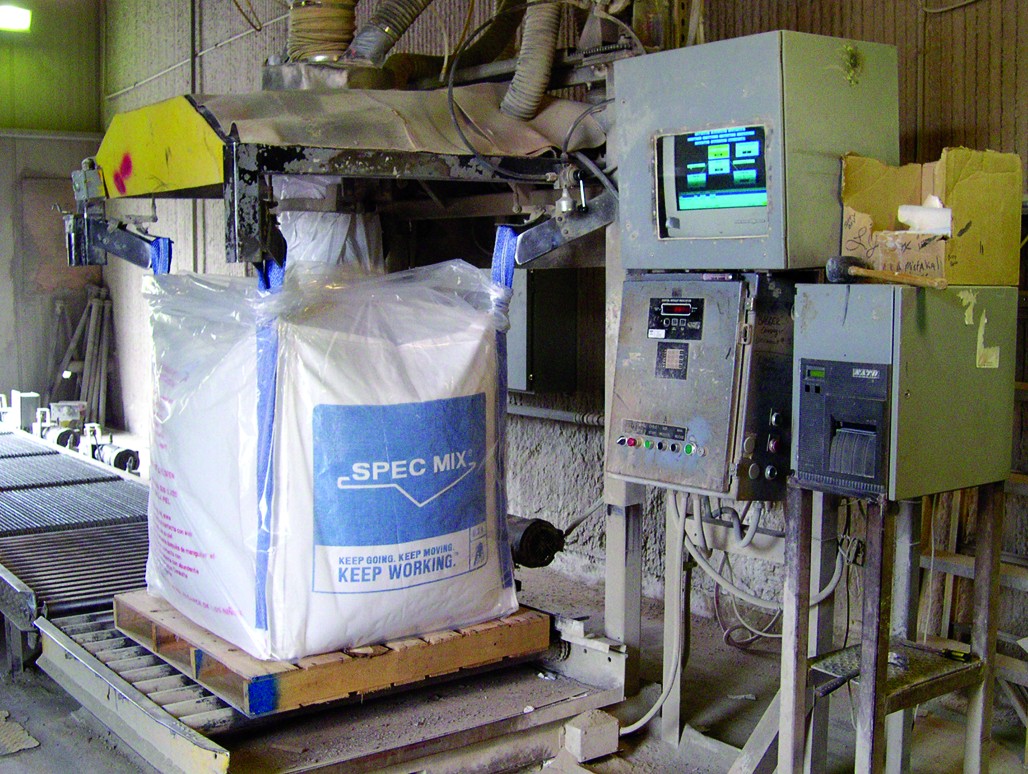
Photo courtesy of SPEC MIX
Photo courtesy of SPEC MIX
The use of the correct mortar for adhered veneers such as manufactured stone, thin natural stone, thin brick, or tile means that both interior and exterior designs will perform as intended.
It has become increasingly common for buildings to be constructed with lighter-weight materials, particularly on building exteriors. That means there has been a transition from heavier structural stone and masonry to lighter-weight structural systems using steel, reinforced concrete, or structural timber. There is still often a desire, however, for the look and durability of masonry. Accordingly, it is now more common that a thinner, lighter veneer of natural stone, manufactured stone veneers, or thin clay brick adhere to a substrate secured to the structure. In so doing, it becomes quite important that the correct mortar materials are used to adhere that veneer so it will remain in place over the life of the building without the threat of harm to people or requiring undue maintenance. This course takes a closer look at the choices for selecting and designing with adhered veneer mortars to achieve these desired outcomes.
Mortar and Grout Overview
Cementitious mortars have been widely used since the times of the ancient Greek and Roman Empires and have remained a fundamental building material in the 2,000+ years since. Mortars are mixed materials made up of several basic ingredients. Cement (i.e., Portland Cement, Masonry Cement, Mortar Cement, etc.) is used for bonding, strength, and durability. Hydrated Lime is used for workability and water retention. Appropriately graded aggregates that generally constitute a majority of the mix are used for bulk and body, strength, and shrinkage resistance. There may also be some admixture ingredients added to address specific performance enhancements for an installation. Water is added in an appropriate amount to mix these ingredients together and initiate a chemical reaction that bonds everything together, including the bonding of masonry or stone materials.
While the formulations and mixes of the ingredients have varied somewhat in different times and places, the essential uses have remained fundamentally the same. In structural applications, mortar is used to hold stacked structural masonry (CMU, brick, stone, etc.) in place and contribute to the structural stability of the assembly. Generally, the mortar has less compressive strength than the units being held in place depending on the ratio of different ingredients and their specific characteristics. Regardless, such structural mortar has been the fundamental basis of the design and construction of buildings that use stone, brick, and other masonry products for structural walls.
Mortar is also used in non-structural applications to adhere thinner products (i.e., thin stone, masonry, tile, or manufactured concrete products) to the surface of a structural system that is already in place. An additional material may or may not be provided to create a smooth substrate (cementitious scratch coat, cement board, etc.) before the surface products are applied. The applied, thinner surface products are referred to as a veneer in this case and the mortar serves to adhere the veneer to the prepared substrate.
Pointing Mortar, sometimes referred to as joint grout are terms used for mortar that serves as a finishing material. Rather than using it to adhere materials together, it is primarily used to fill gaps, joints or other separations of thin masonry units. Its purpose is generally to seal the openings and create a more uniform surface that not only looks more finished, it also helps to keep out weather, dirt, debris, and other things that are less than desirable in construction.
For purposes of this course, we focus on the adhered application of thin masonry veneer which has become increasingly more common in design and construction compared to structural, heavier load, applications. In this context, there are three ways mortar is used in veneer applications:
- Scratch coat: Before a thin veneer material can be applied to a wall, a layer of mortar that is textured with a trowel (i.e., “scratch” the surface) may be applied evenly over the substrate, particularly if that substrate surface is at all irregular or uneven. Many veneer products require a metal lath to be incorporated as part of the substrate, so the scratch coat is commonly installed over that and any fasteners that hold it in place. This all makes it easier, in many cases, for the thin veneer to be applied properly once the scratch coat is solidified.
- Bond coat: Whether a scratch coat is needed or not, the veneer material needs to be bonded to the prepared surface with an appropriate mortar. This bond coat may be applied directly to the wall or applied onto the back side of each piece of veneer material and pressed into place.
- Pointing mortar: Some mixes are also designed and specified, with or without colorant, to be used for filling the gaps or joints between the thin masonry veneer units. This mortar is intended to fill all the gaps and seal the surface of the wall where it is being applied.
Each of these types of mortars can have variations in the way that they are mixed and the ratio of the different ingredients used to suit the needs of residential and commercial construction.
Photo courtesy of SPEC MIX
Mortar is needed for a scratch coat to prepare the substrate and for a bond coat to adhere the veneer product to the wall.
MORTAR MIXING
As already noted, mortars of all types require proper proportioning and mixing of the basic ingredients to produce the needed type of material. For best results, it is imperative that the proper ratios of each ingredient are maintained, or else different results may occur in terms of strength, durability, and general performance.
Site-Mixed Mortar
The traditional means to mix mortar ingredients has been to have bulk materials delivered to the construction site and shoveled by hand into a mechanical mixer. There are some obvious limitations to this approach since the mixing is completely dependent on the skill and understanding of the field worker(s) carrying out that mixing. Those hired to do the mixing may not be the most skilled workers, rather they are often the newest or youngest workers who are overseen by others who are focused on other tasks. Regardless, the quality of the mortar is dependent on the proper mixing of ingredients which also needs to be consistent between batches across an entire workday and project. This can be compromised by the fact that hand mixing is truly tiring work with heavy lifting, twisting, and turning all required.
Beyond the human factors, the outdoor conditions where mortar is mixed can have a significant impact on the quality. The ingredients, first and foremost, need to be protected from weather, which is commonly achieved with tarps over materials placed on the ground, particularly for sand. However, that doesn’t address airborne water vapor which can increase the moisture content of the sand beyond desirable levels or the moisture content of the sand when delivered to the jobsite from the supplier where it is not protected and often washed with water in the production process. It is also quite possible that ingredients placed on the ground can become readily contaminated with dirt or salts—things that can damage the mortar and contribute to unwanted efflorescence on the face of the finished product. Efflorescence is known to occur when water is present in the wall system, soluble salts are in the mortar or the masonry/stone/concrete units, and static pressure is present causing the water to migrate through the units and bring the salts to the surface. The storage of sand and other mortar ingredients on the ground for mixing can’t guarantee that soluble salts won’t contaminate the mix and later cause efflorescence or staining of the surface.In short, very strict quality control on the storage and protection of the ingredients is equally as important as quality control of the people doing the mixing and preparation of the mortar.
Pre-Mixed Mortar
The preferred alternative to site-mixing is to have mortars preblended in controlled conditions in a factory. Factory preblended masonry mortars eliminate most of the quality control issues and inconsistencies related to both worker skills and outdoor conditions. That’s because the mixing is carefully controlled using computerized equipment that measures the weight and volume of each of the ingredients to be sure the proportions are correct for the intended type of mortar being produced. By storing the ingredients either inside a factory or weather-tight silos, site conditions, weather, moisture issues, and efflorescence-causing soluble salts are controlled or eliminated.
Overall, the pre-blended mortar follows a tightly controlled mixing process meaning that the end products can be very consistent from one batch to the next and can be readily replicated if more is needed at a later time. This consistency applies not only to the makeup and performance qualities of the mortar but also to the color—clear concern if it is visible in the final form either as a grout or exposed mortar joint. Once the desired quantity is mixed, it is bagged in weather-resistant packaging and shipped to the construction site. Bag sizes can be anywhere from 50 pounds to 3,000 pounds for efficiency. Once delivered, the appropriate amount of water and final mixing is all that is needed for it to be ready to use.
Factory preblended mortars can be selected from standard offerings or custom-designed and produced to match or meet nearly any color or performance requirement specified. The cost for factory preblended masonry mortars and grouts can vary but are often ultimately the same (or sometimes more cost-effective) as jobsite mixed materials due to increased yield from the materials used and real on-site labor savings. The biggest benefits of preblended products overall, however, are greatly improved quality control and consistency across a project, i.e., truly meeting the specifications. Masons appreciate consistency since that makes their work look and perform better while making it easier to use than site-mixed products.
Photo courtesy of SPEC MIX
There are two ways to make mortar—field mixed outside on a jobsite with local labor or preblended in a factory with skilled workers and computerized equipment for complete quality control.
Photo courtesy of SPEC MIX
TESTING FOR QUALITY CONTROL
Anyone who has written specifications knows that the key to quality control is to cite the appropriate industry standards and require that the specified materials provide evidence of meeting the appropriate level of performance through testing. In the case of mortars, there are several relevant testing standards listed as follows:
- ASTM C270 “Standard Specification for Mortar for Unit Masonry” This standard covers all mortar for unit masonry, not just adhered veneer. Specifically, “this specification covers mortars for use in the construction of non-reinforced and reinforced unit masonry structures. Four types of mortar are covered in each of two alternative specifications: (1) proportion specifications and (2) property specifications.”
- ASTM C1714 “Standard Specification for Preblended Dry Mortar Mix for Unit Masonry” This focused specification “covers masonry mortars whose materials and design requirements are governed by ASTM C270 (listed above) but are preblended dry in a factory instead of produced from individual raw materials delivered to the jobsite. The tight control of ingredient ratios possible with preblended dry mortar is also covered.”
- ASTM C482 “Standard Test Method for Bond Strength of Ceramic Tile to Portland Cement Paste” The intent is that “This test method covers the determination of the ability of ceramic tile, ceramic mosaic tile, quarry tile, porcelain tile, and paver tile to be bonded to Portland cement paste.” As such, it is focused on tile being used as the veneer.
- ASTM C1780 “Standard Practice for Installation Methods for Cement-based Adhered Masonry Veneer” The stated scope is “This practice is intended to provide accepted procedures to designers and installers of cement-based adhered masonry veneer in residential and commercial construction. This information is meant to complement the specific installation instructions provided by manufacturers of cement-based adhered masonry veneers and recognized building codes but is not meant to replace them. This practice covers the installation of cement-based adhered masonry veneer units for application as adhered veneer to exterior and interior walls, columns, landscape structures, and other structures suitable to receive adhered veneer.”
- CSA A179 “Mortar and grout for unit masonry” This Canadian Standard specifies requirements for “a) mortar for use in bedding, jointing, and bonding of masonry units; and b) grout for use in filling core, cell, or cavity space in unit masonry construction.”
- ANSI A118.4 “A118.4 American National Standard Specifications for Modified Dry-Set Cement Mortar” This standard covers the physical properties of thin-set mortar but not its composition. Some states are requiring compliance of ANSI A118.4 for improved performance over ASTM C482.
- ANSI A118.15 “American National Standard Specifications for Improved Modified Dry-Set Cement Mortar” In recent years, the number of available thin set mortars which comply with the requirements of ANSI A118.4 has increased. Since there is a wide range of applications and features of ANSI A118.4 mortars, the need to distinguish standard-performing mortars from high-performing mortars became necessary. Hence, this standard provides another level of classification for thin-set mortars. The main distinguishing feature between the two categories of mortar is the 28-day shear bond strength requirements and a focus on the use of silica sand.
It is important to recognize that the ASTM and CSA standards may be able to be met using site-mixed products, but the ANSI standards referenced here cannot be met on-site. Rather, they can only be met by using factory-preblended products that can be tested in controlled laboratory conditions.
Based on all of the above, we focus next on the three primary preblended products that can be used in a variety of settings for adhered veneers.
TYPES OF PRE-BLENDED MORTARS
As noted, mortars can be pre-blended in any number of mixes to suit different conditions and project requirements. Within that variety, there are three primary types of mixes, each with its own general makeup and intended use. These are summarized in the following sections.
Standard Adhered Veneer Mortar (AVM)
The standard AVM is a versatile and durable mortar intended for thin veneers. It is formulated for lightweight manufactured thin veneer masonry units (e.g., manufactured stone, thin brick, etc.) over wood frame and steel stud construction. It typically contains an optimized blend of dry cementitious materials, masonry sand, and performance-enhancing admixtures specifically designed for use as a scratch coat, bond coat, and joint grout. When formulated and mixed cohesively, it can provide consistent workability, anti-sag capabilities, high water retention, and excellent bond strength. The final wall system produced is generally a non-load bearing, aesthetically pleasing exterior veneer or interior finish ideal for residential and light commercial construction.
AVM is generally designed to be installed with about a ½-inch layer for good bonding and is compatible with the characteristics of most masonry thin veneer units. It is also generally available in standard and custom colors for joint grouting of the masonry veneer. AVM products are available that meet ASTM C270, CSA A179, and ASTM C1714 applicable requirements.
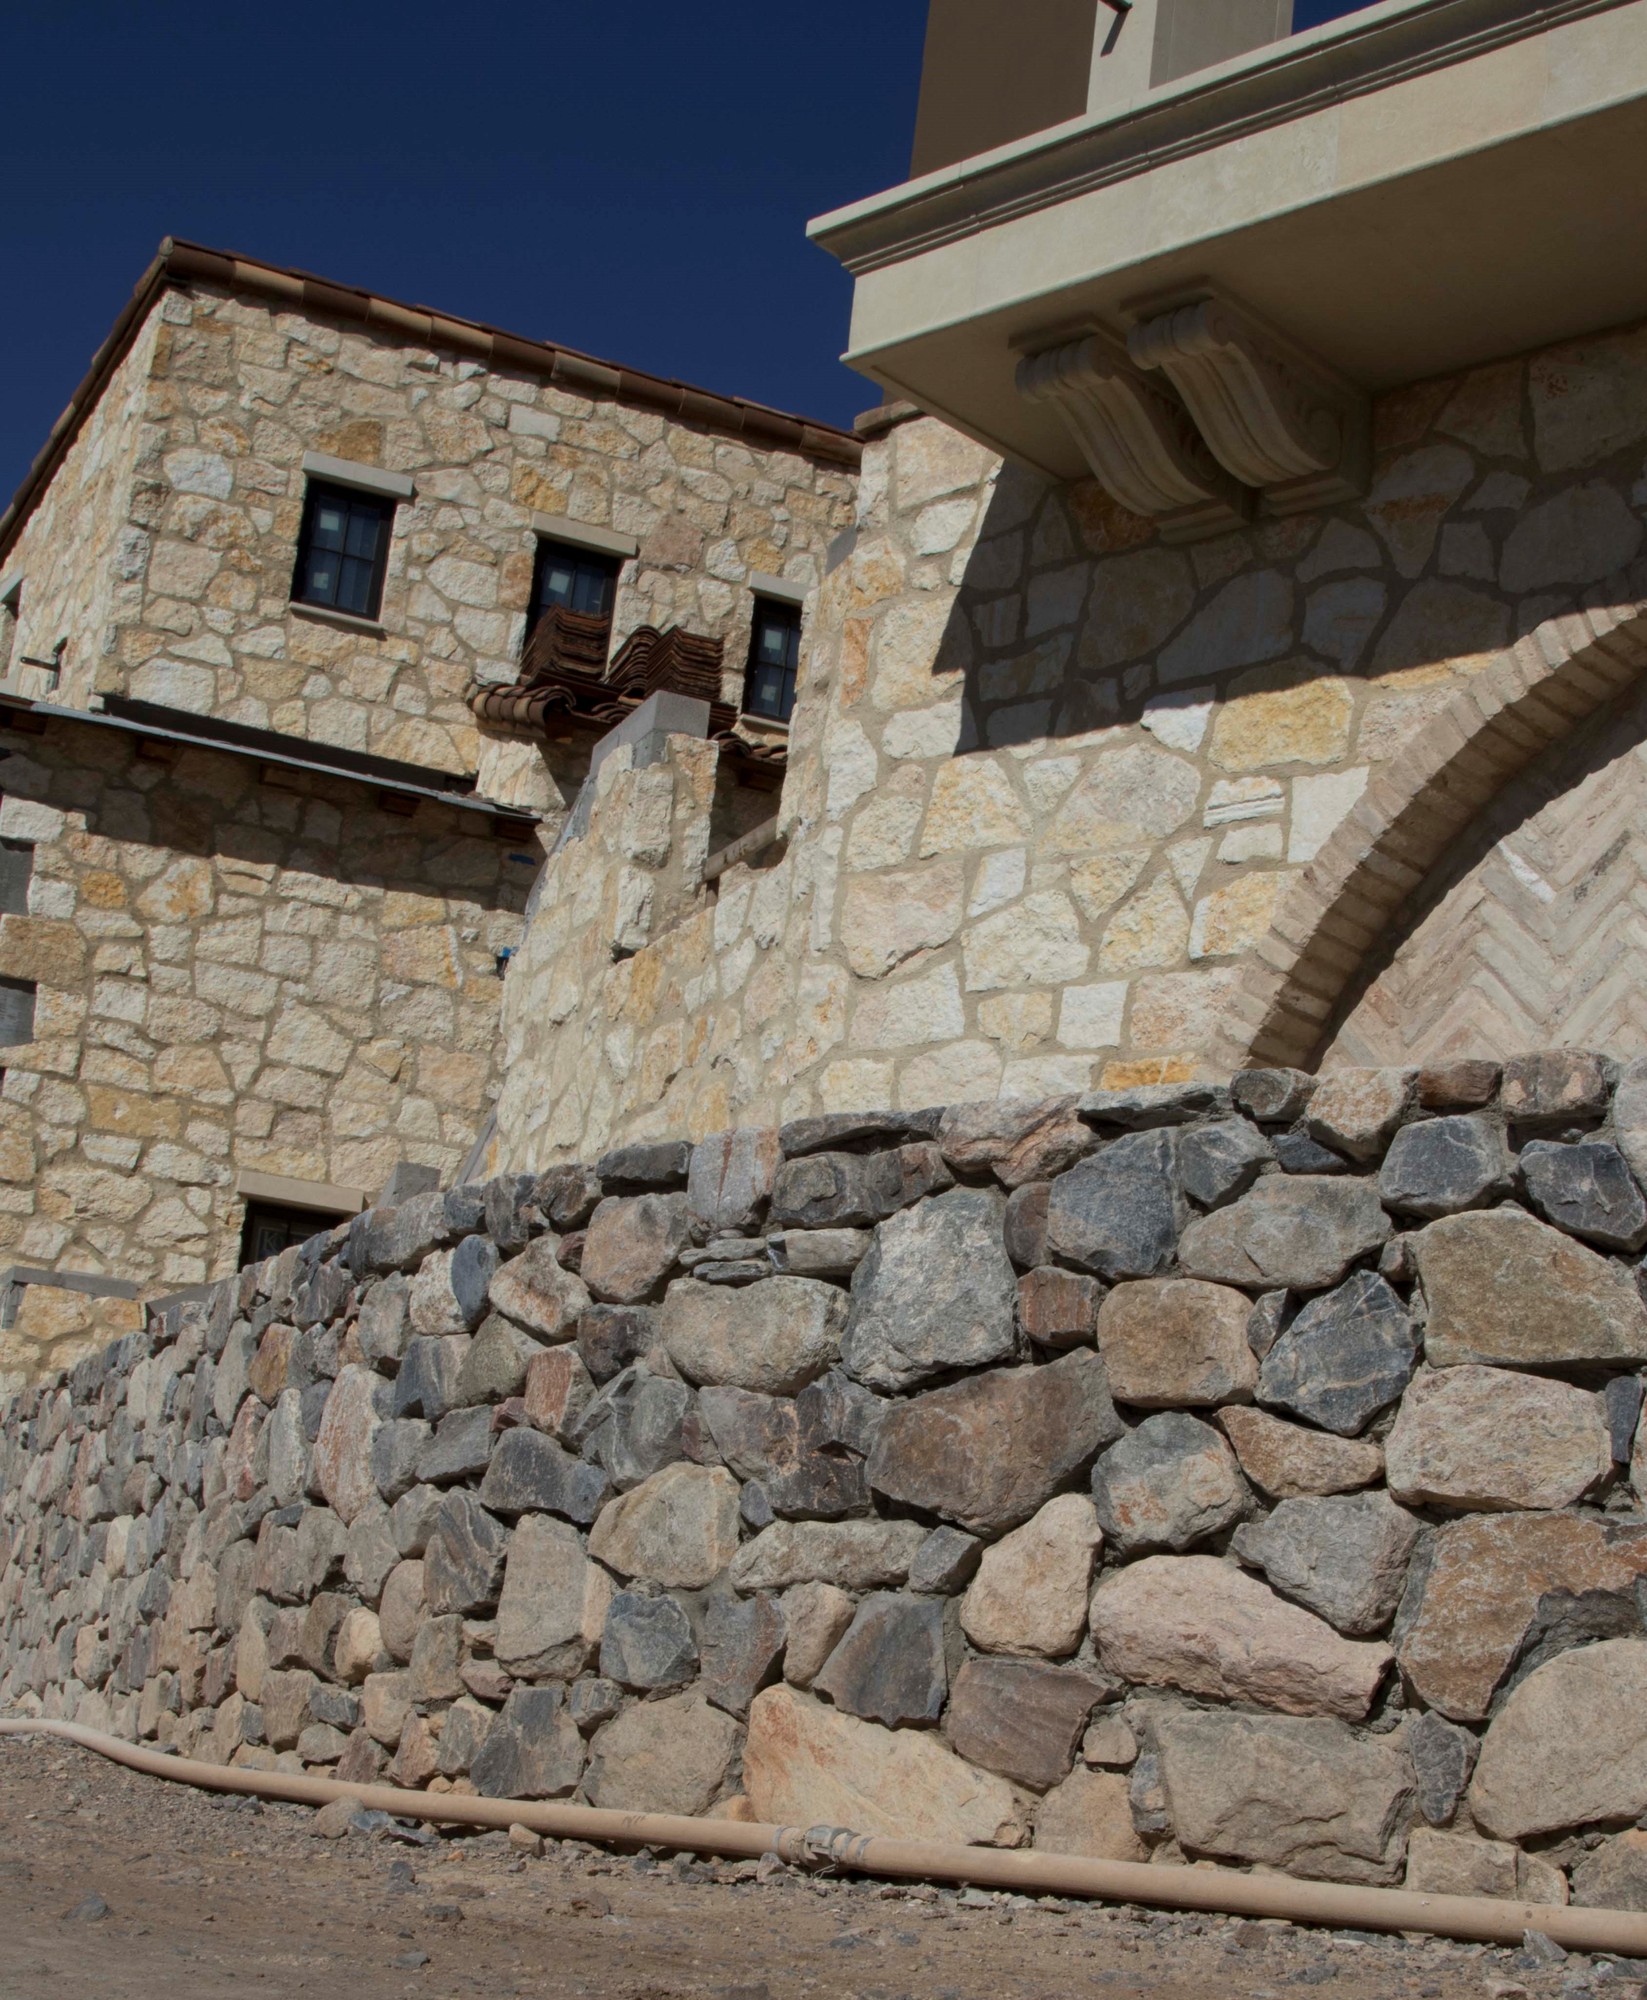
Photo courtesy of SPEC MIX
Following the correct industry standards and specifications for mortar helps assure quality control and predictable performance in exterior and interior conditions.
Polymer Modified Adhered Veneer Mortar (PMAVM)
Mortar that is modified by adding in polymers (PMAVM) is an advanced adhered veneer mortar. It is intended for use in bonding manufactured stone veneer, natural thin-cut stone, and thin brick to cementitious substrates including scratch coats, CMU, and properly prepared concrete. It is formulated to achieve low sag, high productivity, and a strong bond between the veneer products and the cementitious substrate. It also provides excellent workability, water resistance, efflorescence mitigation, and durability. The anti-slip properties of PMAVM make the installation of large natural thin-cut stone easy while holding units in place for an extended time.
PMAVM is also a thick bedding mortar that can be used for scratch coat, bond coat, and jointing between adhered stones/ bricks. It has higher flexural bond strength and better adhesion than standard AVM due to the polymer admixtures in the mix. It meets ASTM C270, CSA A179, and ASTM C1714 applicable requirements plus the ANSI 118.4 standards when tested in a pre-blended condition.
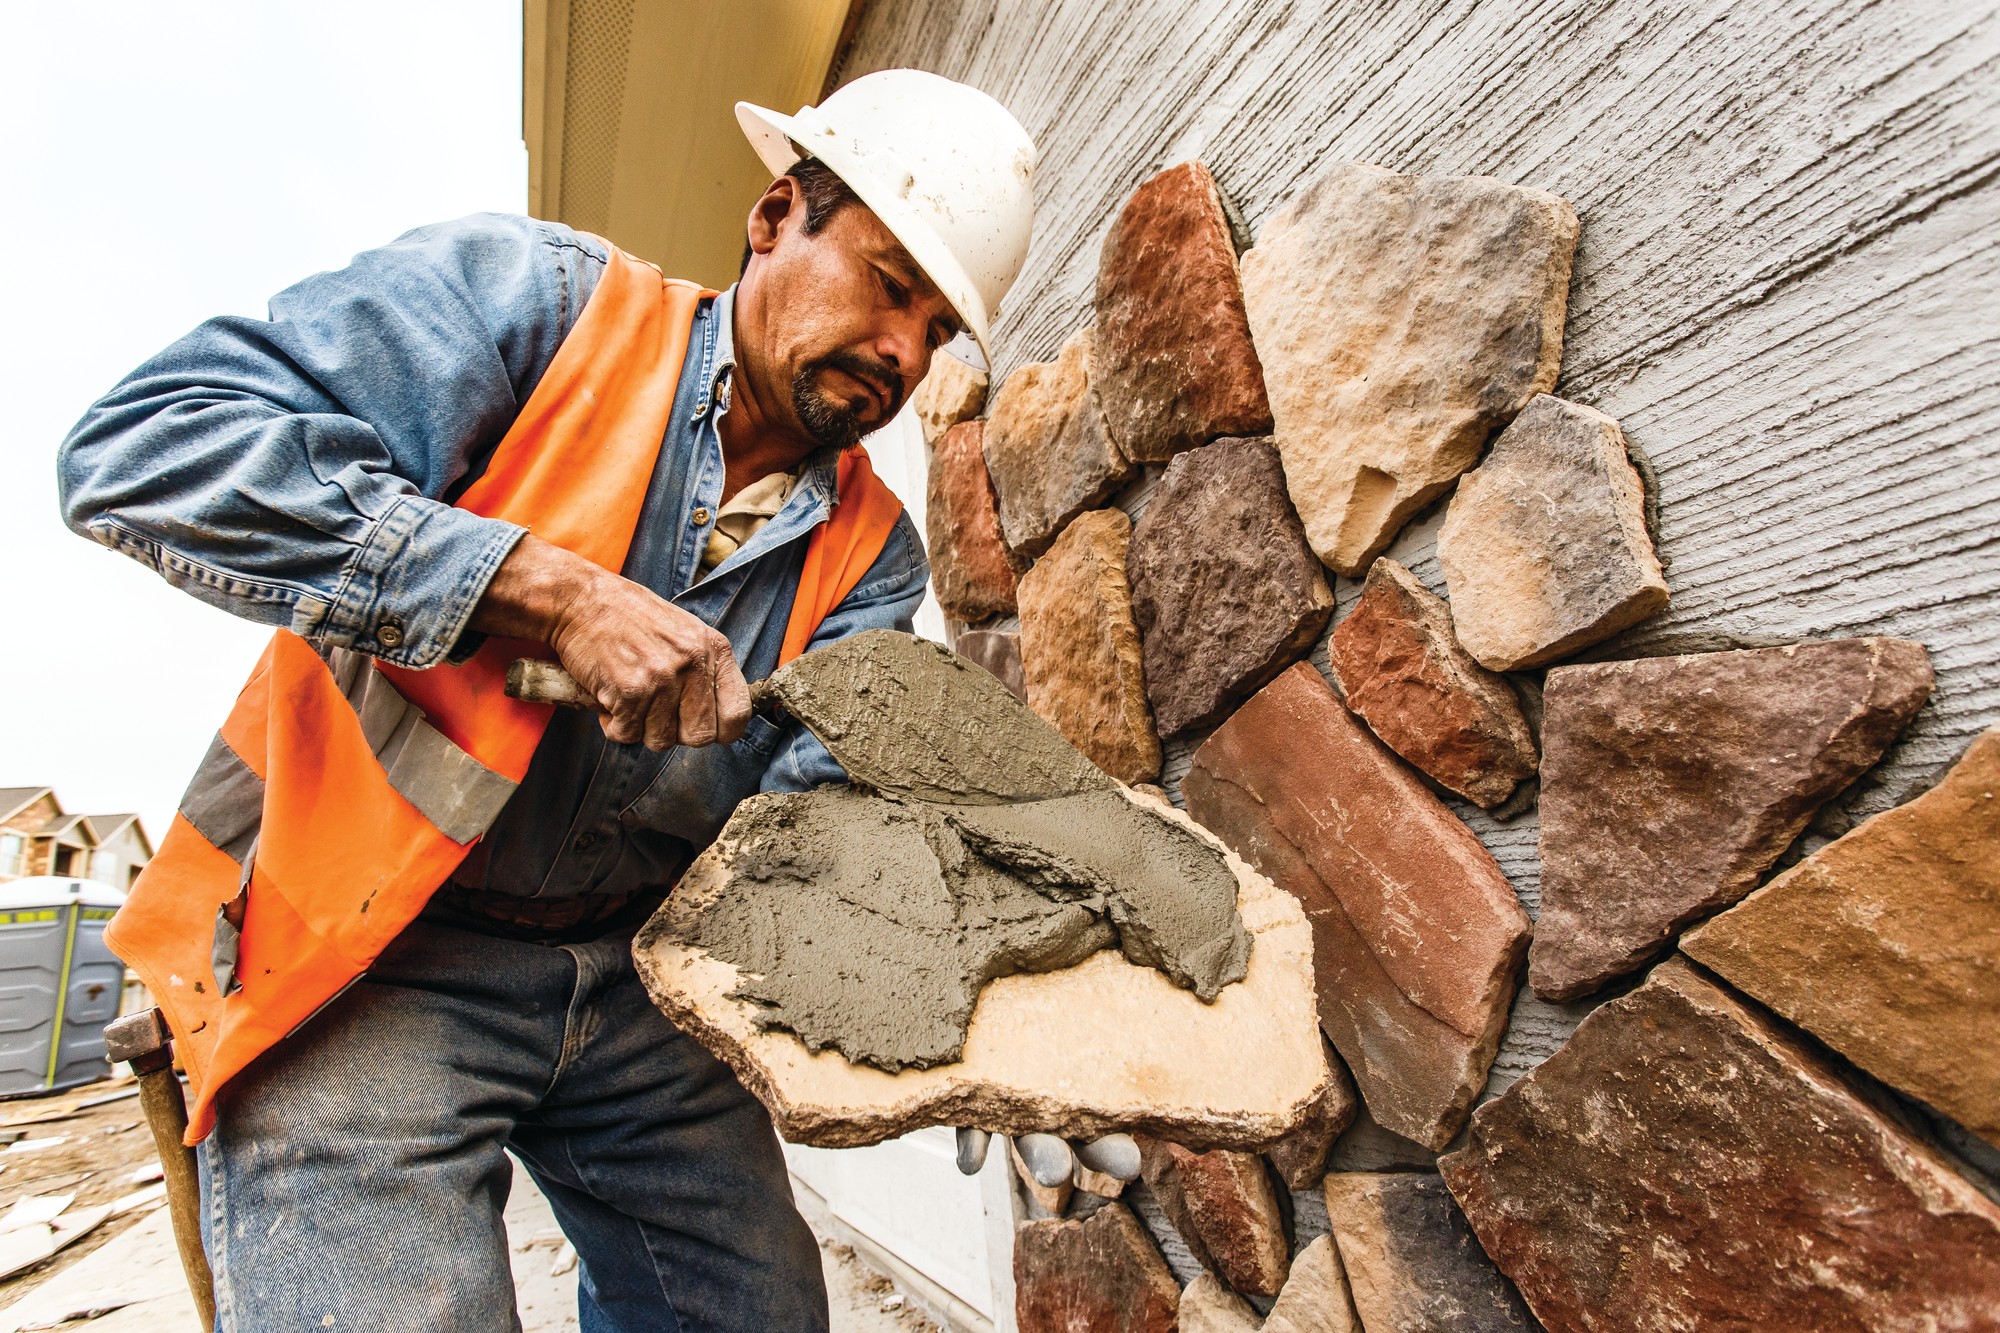
Photo courtesy of SPEC MIX
Standard AVM mortar can be used over wood- or metal-framed walls as a scratch coat, bond coat, or joint grout.
Thin Bed Adhesion Mortar
Thin bed mortar (also called “thin-set”) means ¼ inch mortar thickness instead of ½ inch which is standard for other mortars. It is available as a premium preblended polymer-modified thin-set mortar that has the best bond strength compared to standard AVM and PMAVM. It is intended to bond any manufactured veneer product (manufactured stone, brick, concrete products, or tile) or natural stone to a variety of substrates. Those substrates include hardened scratch coats with a smooth finish, concrete (properly prepared and free of curing compounds), concrete masonry units, cement backer boards, and interior gypsum wallboard with or without a primer (consult with the primer manufacturer for suitability). It can also be applied over suitable air and water barriers (AWBs) in exterior walls if they can support the weight (i.e., load-bearing AWBs).
Thin bed mortar can be blended to have an anti-sag formulation and use optimized sand gradation to provide superior workability, adhesion, and durability appropriate to both interior and exterior applications. Thin bed mortar also has the best freeze-thaw capabilities of mortar materials. However, it is not intended to be used as either a scratch coat or as a jointing material—it is to be used as an adhesion mortar only.
Thin bed mortars typically meet ASTM C270, CSA A179, and ASTM C1714 applicable requirements plus the ANSI 118.4 and/ or ANSI 118.15 standards when tested in a pre-blended condition. They also meet the TMS 402/602 Building Code Requirements and Specification for Masonry Structures shear strength requirements when tested in accordance with ASTM C482. When used with tile, it should follow the Tile Council of North America (TCNA) Handbook for Ceramic Tile Installation.
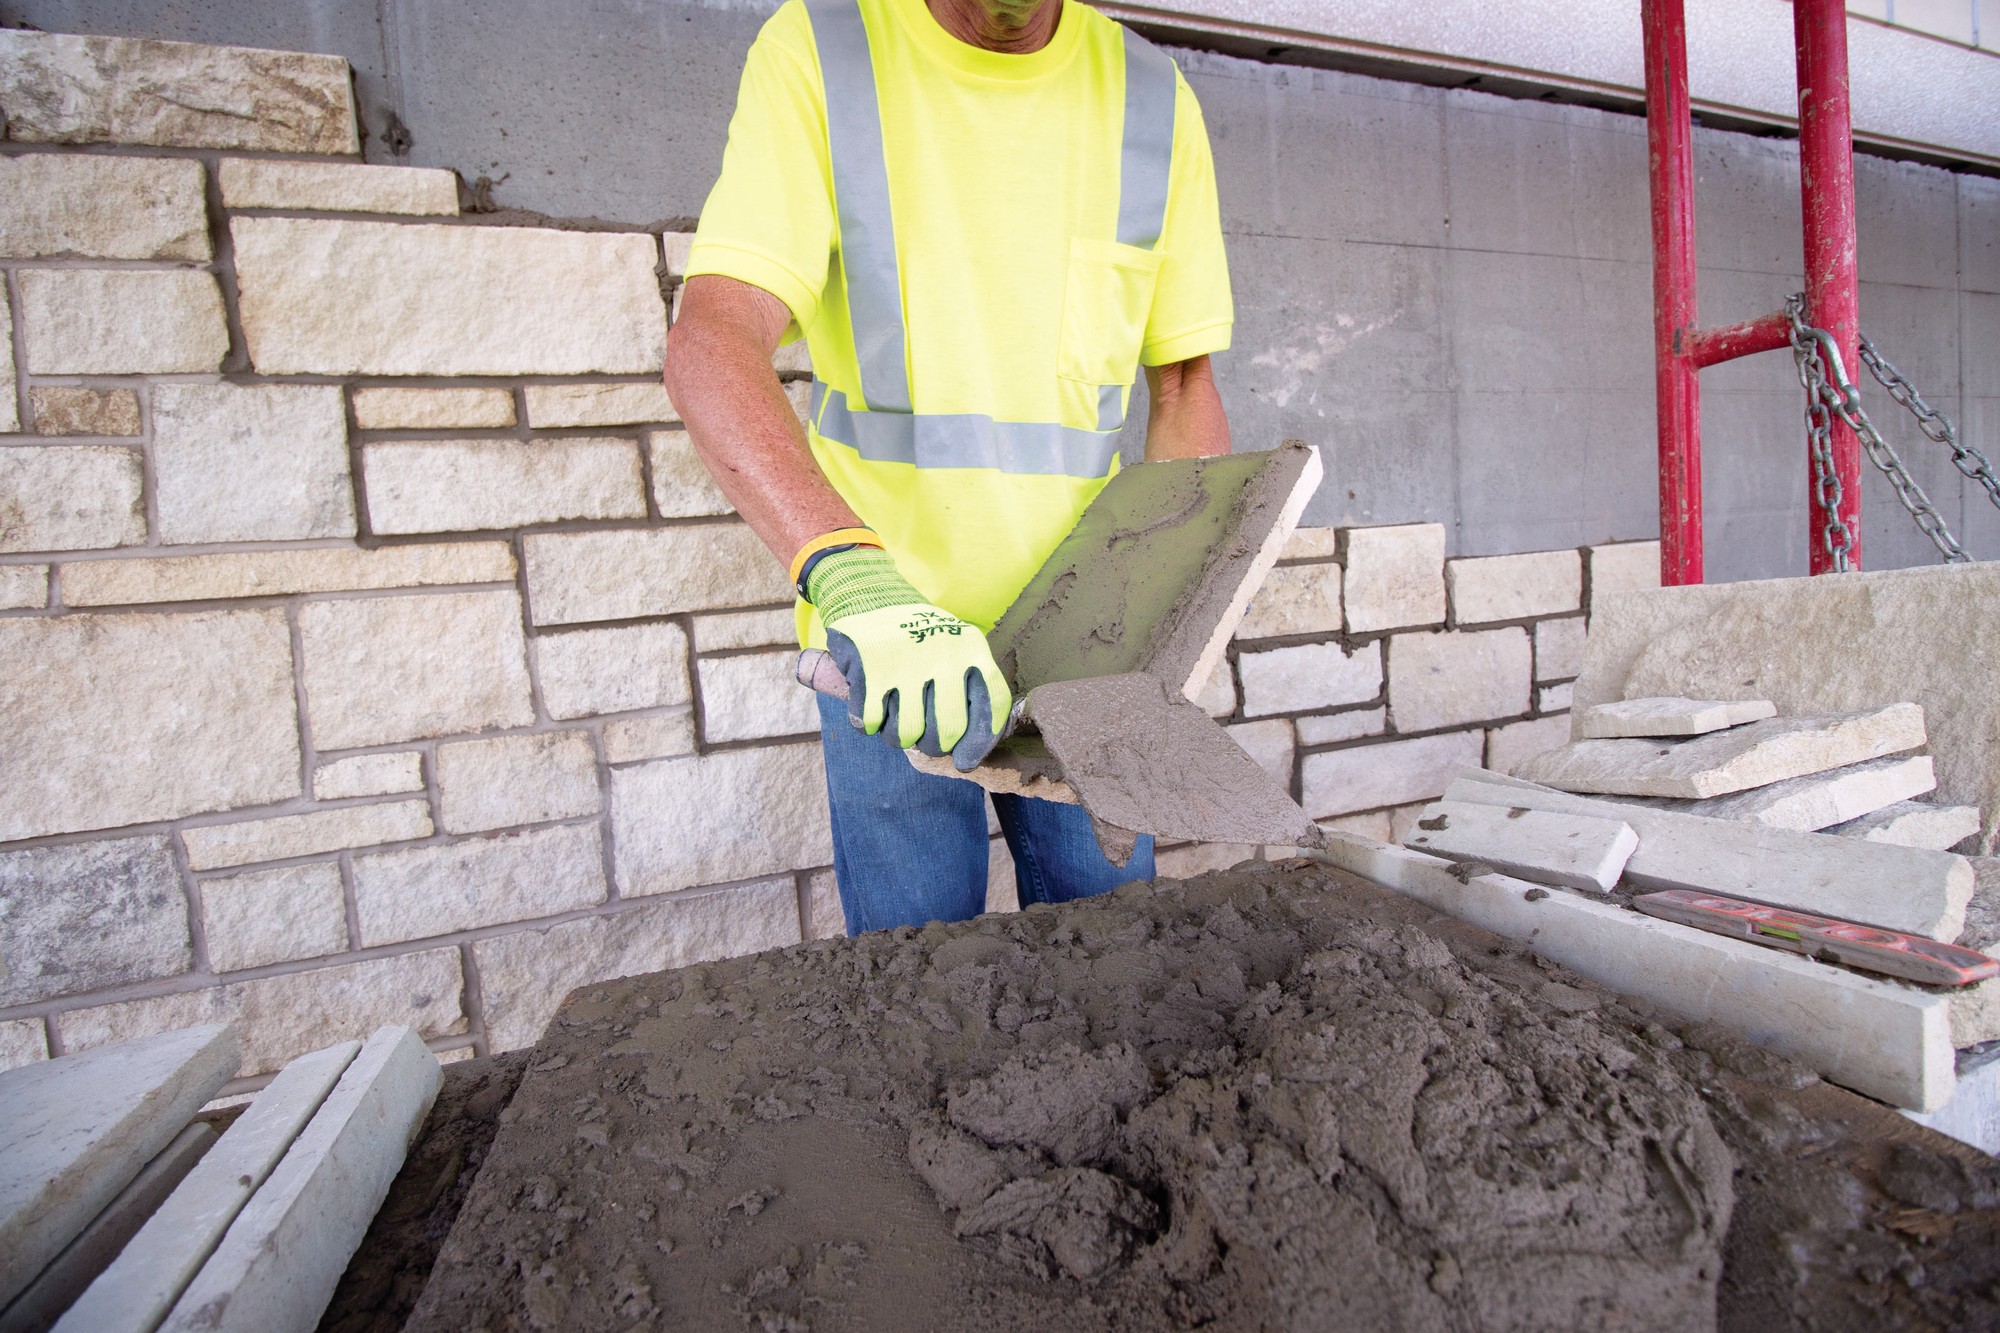
Photo courtesy of SPEC MIX
Modifying adhered veneer mortar with polymers improves performance characteristics, particularly for heavier pieces of stone or masonry products.
Mike Rolf is the National Sales Manager for Masonry Products at SPEC MIX and regularly sees the range of pre-blended mortars that are needed on many different projects. He notes, “Masonry mortars, particularly adhered veneer mortars, are engineered to meet the properties of the masonry units being installed. Whether it’s the unit’s density, porosity, or initial rate of absorption, all of these properties are considered to make customized mortars for high shear bond strength between the unit and the wall’s substrate.”
GREEN BUILDINGS AND MORTAR
Cement-based products, such as mortar and concrete, have received a lot of attention recently centered around their embodied carbon content in the manufacture and delivery of these products. In response, the industry associations and individual companies have been pursuing strategies to operate with responsible sustainable management to reduce their carbon footprint by reducing operations CO2 emissions. There is also ongoing collaboration within the industry for manufacturers to reduce their emissions and carbon footprint of cement-based products overall. Selecting products made by manufacturers with this commitment is a first step in meeting green building goals.
In terms of product makeup, mortar can be manufactured to meet specifications promoting the use of pre-consumer recycled content such as fly ash and or supplementary cementitious materials. Percentages of recycled content vary for each product and the properties are well measured by weight to meet rigorous standards of ISO14021 (International Standardization Organization).
On the project site, there are methods in place available to use pre-blended mortars in ways that reduce waste and encourage recycling. One such method is to have large packages of dry mortar shipped to the project site and then use a portable silo to store, mix, and aid in installing the mortar and veneer material. This approach helps contractors reduce overall job site pollution and waste by controlling the product production based on material needed at any given time during a project’s production schedule. This system also minimizes the need to dispose of unused products or discarding of empty bag waste that ultimately impacts the environment. The bulk bag system and nature of using preblended materials eliminate the need for sand and other aggregate piles that could leach into the groundwater, discharge into stormwater systems or blow into the atmosphere, lending to a high priority for health and safety. For every recyclable bulk bag of premixed construction product distributed to a project site, it is estimated that as many as 14 paper bags will never be produced nor disposed of in landfills.
Manufacturers of pre-blended mortars can also strive to minimize the carbon footprint of trucking goods. There are many North American production facilities strategically located close to metropolitan areas where the bulk of construction activity takes place. These facilities extract, process, and package their products for regional, if not local community distribution. It is, therefore, quite easy to find mortar plants and extraction points located within a 500-mile radius or less from jobsites.
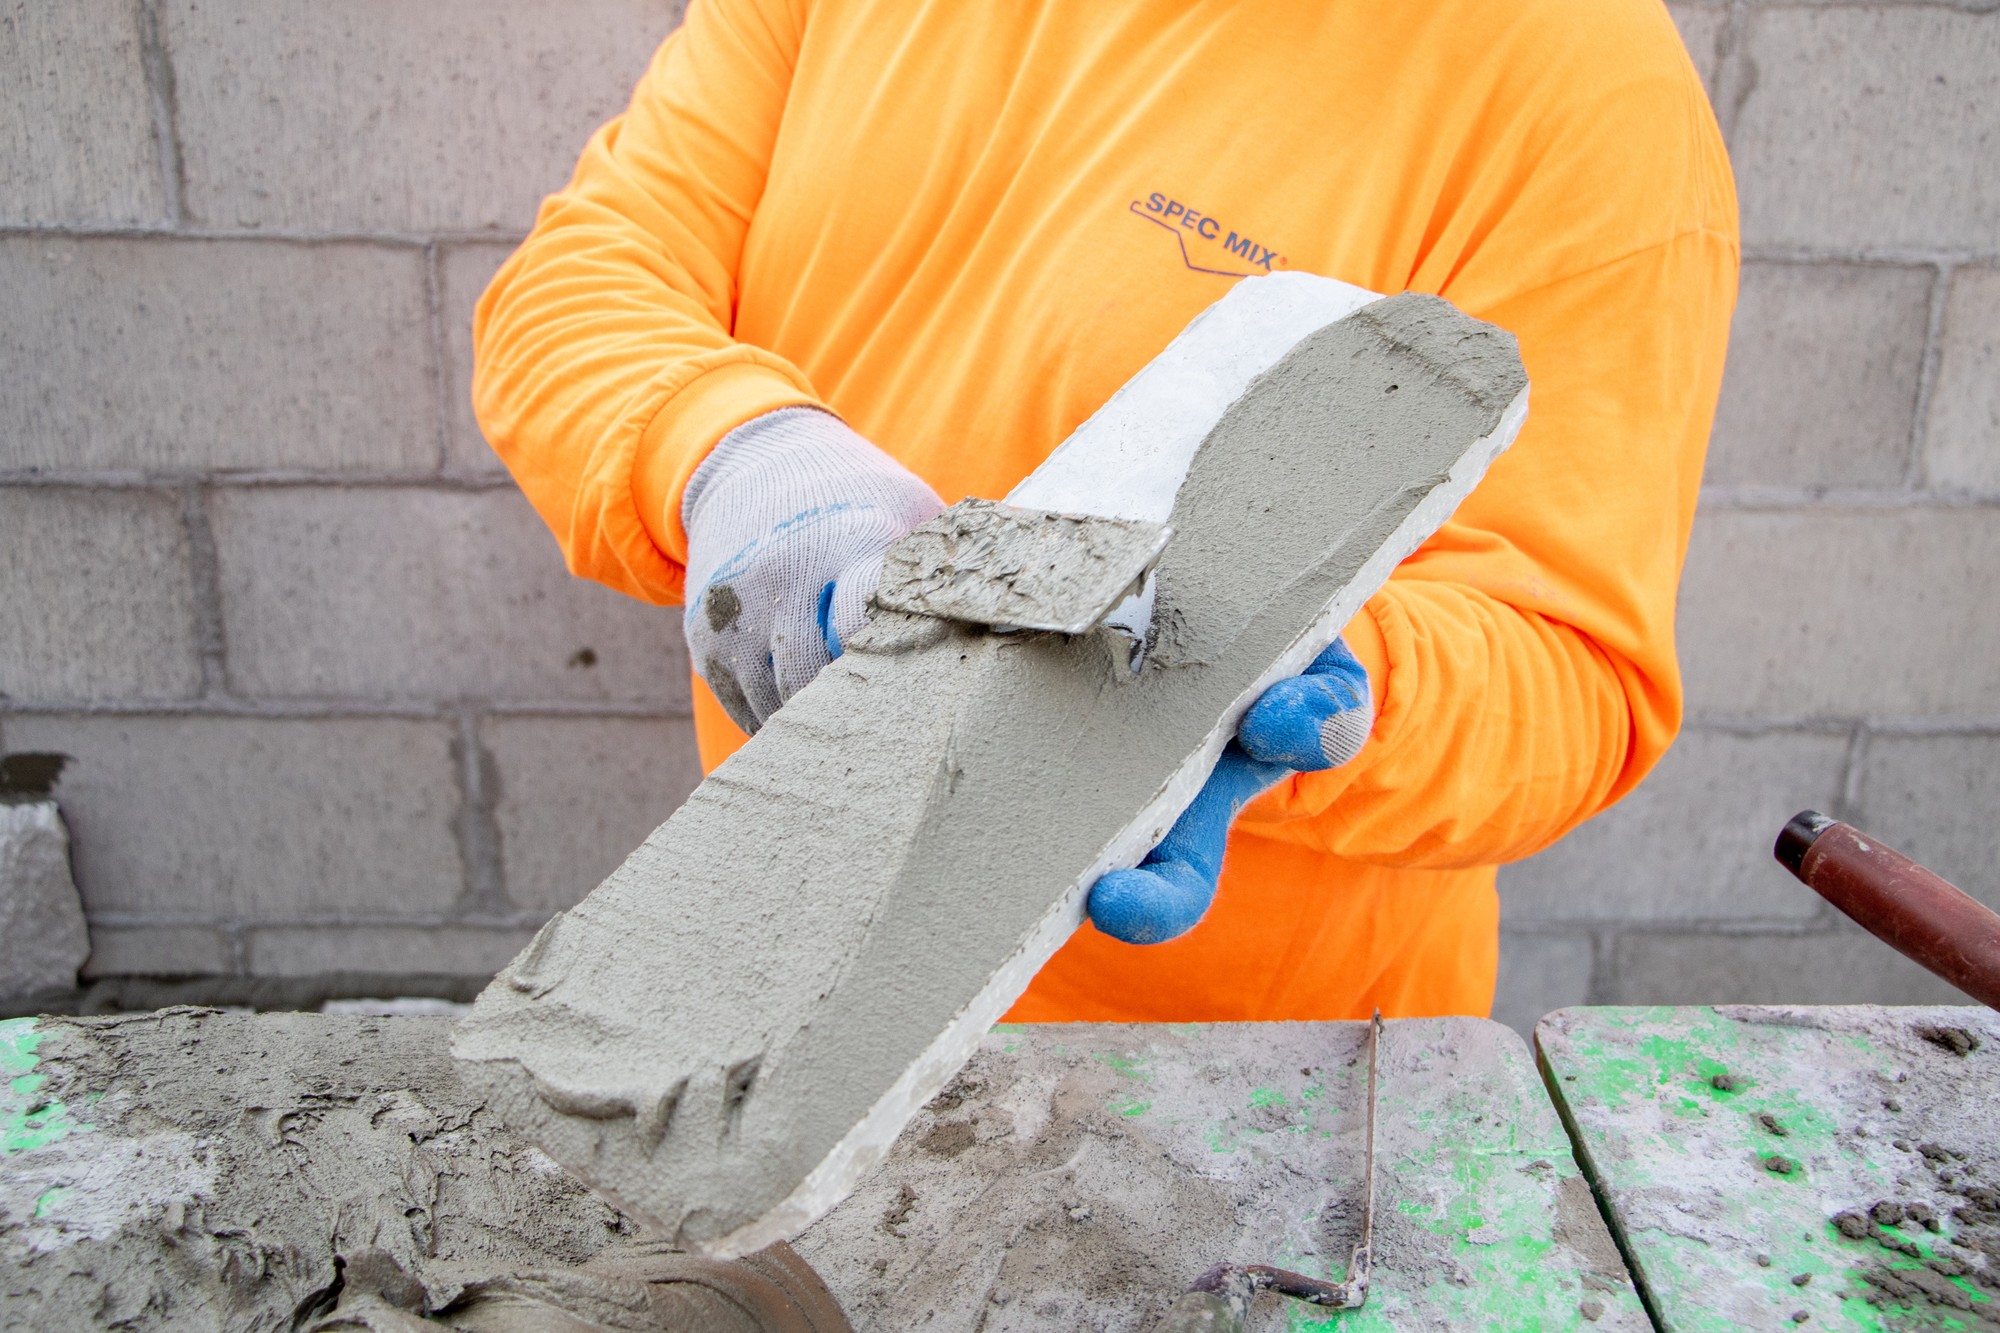
Photo courtesy of SPEC MIX
Thin bed mortar, also called thin-set mortar, is available in a premium, higherperforming blend for many different applications.
DESIGN AND CONSTRUCTION CONSIDERATIONS
It is important to note that any discussion of mortar also needs to address the importance of some of the design, detail, and installation methods of the veneer materials being installed. This helps to avoid the potential of someone claiming there is a “mortar issue” after the project is completed, when in fact a problem or imperfection may be related to some other part of the assembly. With that in mind, consider all of the following:
- Veneer Units: Different types of masonry veneer products have their own industry standards and installation guidelines. Following these documents for the proper installation of manufactured stone, natural stone, thin masonry, tile, etc. is the best way to achieve predictable performance. For example, the 5th edition of the Concrete Masonry Hardscapes Association (CMHA—formerly NCMA) Installation Guide for Manufactured Stone Veneer (MSV) (the basis for information in this entire section) covers many of the design, detail, and installation considerations needed to achieve a quality installation. MSV units installed in accordance with this guide must meet the minimum requirements of ASTM C1670/C1670M. “Standard Specification for Adhered Manufactured Stone Masonry Veneer Units.” NCMA Tek Note 20-01 “Key Installation Checkpoints for Manufactured Stone Veneer” is a supplement to these documents and should also be consulted. For installations that use lath, the appropriate standard should be followed such as ASTM C1063 “Standard Specification for Installation of Lathing and Furring to Receive Interior and Exterior Portland Cement-Based Plaster” should be consulted.
- Flashing: In exterior applications, flashing is likely to be needed and incorporated into the installation, either as an attached product or a self-adhered “tape”. Such flashing must be installed at all through-wall penetrations and at lower boundaries of adhered veneer installations. All flashing and flashing accessories must be corrosion-resistant and integrated with the WRB materials (if present). Generally, flashing is not required for interior applications if they are not exposed to water—if water is present then the installation should be treated like an exterior installation. In all cases, follow applicable building codes and manufacturer recommendations for flashing installation locations and material compatibility. Before installing an adhered veneer, verify that all flashing, including roofing kickout flashing, has been properly installed. Flashing material should extend above horizontal terminations, roofing material, and drainage planes or drainage products.
- Rainscreen Systems: Rainscreens have become a popular way to allow drainage in an exterior wall so any water or moisture can escape rather than be trapped behind claddings. Such a system can be part of an adhered veneer system if a rainscreen product such as drainage mats or formed polymer sheeting is installed properly as the substrate for the mortar to adhere to. Similarly, construction techniques such as strapping or furring can be used to create a capillary break or air space between the cladding and the water-resistive barrier (WRB). Manufacturer’s recommendations should always be followed for rainscreen / drainage system applications with adhered veneer wall systems. Note that building code requirements for rainscreens vary by region and can change between different versions of the code and should be verified in all cases.
- Weep Screeds and Casing Beads: Weep screeds and casing beads must be corrosion resistant, with weep screeds having a minimum vertical attachment flange of 3.5 inches that terminates behind the water-resistive barrier (if present). The minimum thickness of metal weep screeds and casing beads should not be less than 0.0179 inches (26 gage). For plastic weep screeds or casing beads, the minimum thickness is 0.050 inches. Some applications may not require the use of flashing, weep screeds, and casing beads to prevent water penetration. In cases where there is no WRB present, a weep screed is usually not required but a weep screed or casing bead can still be used for aesthetic purposes. In cases where a drip edge is needed based on a cladding transition, then flashing is required. The use of both flashing and a weep screed simultaneously is not typically necessary. Nonetheless, all flashing material should be integrated with water-resistive barriers to mitigate water penetration into the structure. The WRB should overlap the weep screed flange.
- Movement Joints: Different elements and materials within any structure move differently in response to applied loads or as a result of fluctuations in temperature or moisture content. Therefore, design consideration should be given to where differential movement is expected such as the intersection of dissimilar materials or at the transition between a framed backup assembly and a concrete masonry assembly. Consideration should also be given to placing movement joints in the substrate where recommended by industry standards. Different standards exist for scratch coat, CMU, and cement board substrates and movement joints should follow through the adhered veneer. The layout of the movement joints falls to the design professionals for a project.
- Lath: Many different lath materials have been used successfully for the installation of adhered veneers including self-furring metal lath meeting ASTM C847, welded wire lath complying with ASTM C933, 18 gauge (or heavier) woven wire lath meeting ASTM C1032, or others. All lath products need to be consistent with the veneer manufacturer’s installation instructions and ideally have an evaluation acceptance report from an accredited evaluation service showing compliance with code. All lath and lath accessories must be corrosion resistant, consisting of either galvanized or stainless-steel materials or consisting of materials complying with AC 275, and ASTM C1788. All lath material must be self-furred or use self-furring fasteners.
- Cement Board: Cement board may be used in place of lath and scratch coat if desired. When used, cement board must comply with ASTM C1325 “Standard Specification for Fiber-Mat Reinforced Cementitious Backer Units.” When using cement board, only modified mortars complying with ANSI A118.4 or ANSI A118.15 should be used as the setting bed mortar. Do not use conventional mortars with cement board installations. Refer to ASTM C1780 “Standard Practice for Installation Methods for Cement-based Adhered Masonry Veneer” and manufacturer recommendations for additional details on cement board installations.
- Fasteners: Corrosion-resistant fasteners need to be used to secure flashing and lath or cement board to the structural system. A variety of fasteners can be used such as staples, screws, and nails, provided the heads or washers of these fasteners are large enough to not pull through the lath or cement board and the fastener is of sufficient length to penetrate into the supporting material. For specific fastener selection criteria, refer to ASTM C1861 “Standard Specification for Lathing and Furring Accessories, and Fasteners, for Interior and Exterior Portland Cement-Based Plaster.” Generally, for wood or metal framing or panels using lath, corrosion-resistant staples, corrosion-resistant roofing nails, or corrosion-resistant screws and washers are needed. For cement board, corrosion-resistant cement board screws as recommended by the cement board manufacturer. Fasteners must be of sufficient length to penetrate a minimum of ¾ inch (19 mm) into framing members. For masonry or concrete walls or panels, corrosion-resistant concrete screws or powder-actuated fasteners (or cap fasteners) are recommended.
- Surface Preparation: Surfaces that are to receive adhered veneers must be structurally sound, free of any coatings or materials that would inhibit bonding, and capable of supporting the intended system. Masonry walls, poured-in-place concrete walls, and concrete tilt-up panels must be free of dirt, waterproofing, paint, form oil, or any other substance that could inhibit the mortar bond and must readily accept/absorb water in order to achieve good bond. The surfaces intended to receive adhered veneer units must have a rough texture to ensure good mortar bond. The International Concrete Repair Institute, (ICRI), provides guidance for concrete surface preparation and assessment. Refer to ICRI Technical Guideline 310.2 for additional information on concrete surface preparation, including information on Concrete Surface Profile (CSP), a standardized method to measure concrete surface roughness. A CSP equal to or greater than 2 is usually acceptable for installation over concrete and masonry assemblies. If necessary, cleaning may be done with power washing or mechanical methods (i.e. shot or bead blasting). If a bondable surface cannot be achieved, attach lath and scratch coat before installing any adhered units.
- Clearances: On exterior frame walls, weep screeds, and other base flashings should be held a minimum of 4 inches above grade or a minimum of 2 inches above paved surfaces. This minimum can be reduced to ½ inch if the paved surface is a walking surface supported by the same foundation that supports the wall. Where the backing is concrete or masonry, maintain 2 inches clearance from grade or ½ inch from a paved surface provided that frost heave of adjacent surfaces is taken into consideration.
- Cold Weather Application: Adhered veneer applications should be protected from temperatures below 40°F (4°C) during and immediately following installation. The use of anti-freeze admixtures to lower the freezing point of the mortar is not recommended. Accelerating admixtures may be used provided they comply with ASTM C1384 “Standard Specification for Admixtures for Masonry Mortars” and that admixtures containing calcium chloride are not used. Any veneer pieces containing visible frozen moisture shall not be installed.
- Hot Weather Application: If the environmental conditions during installation exceed 90°F (32°C), additional water may be needed on the scratch coat surface and the backs of the adhered veneer being installed. Providing shade and/or frequent misting of the wall may be required. Consult with the mortar manufacturer to determine if hot-weather mortar mix options are available.
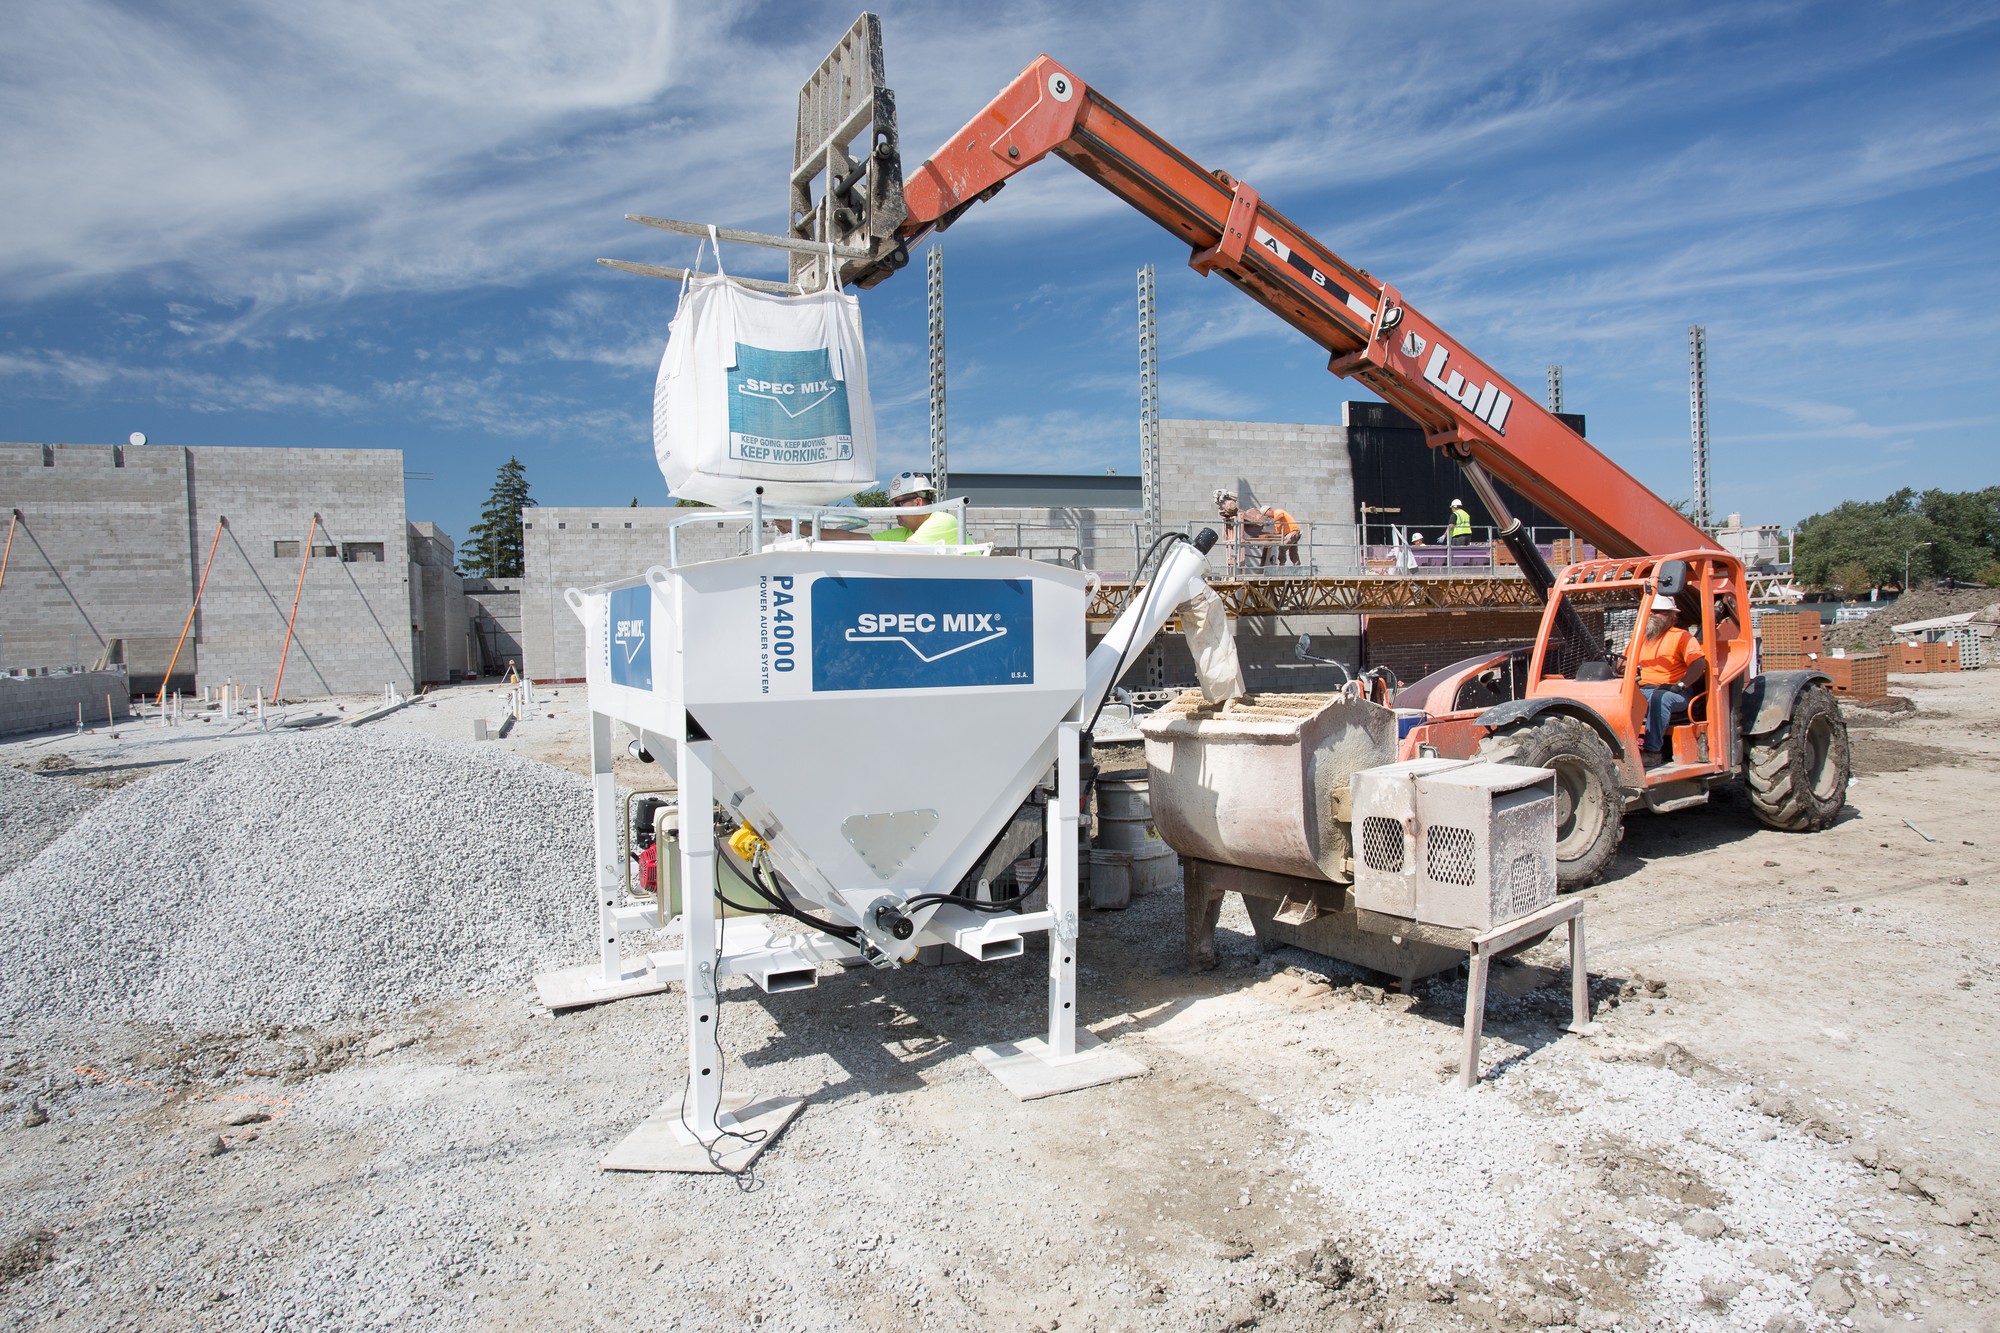
Photo courtesy of SPEC MIX
Using preblended mortar that is delivered in bulk with silos for adding water and processing manages resources and eliminates waste.
SPECIFYING PRE-BLENDED MORTAR FOR ADHERED VENEERS
When specifying interior or exterior veneer systems that are adhered with mortar, it is advisable to review the industry standards and model specifications that can be customized for specific projects, whether new construction or renovation. In a standard, three-part specification format following the CSI or MasterFormat system, it is found in Division 4, Masonry, usually under Section 04 05 00 or a subsection of that. Some of the relevant items to address are highlighted as follows.
Part 1 - General
The scope of the specified work for the adhered veneer mortar(s) and related work as well as any definitions should be called out. It is advisable to call for a pre-installation meeting and to request submittals based on the project needs, including the request for LEED documentation if any relevant credits are being pursued. Quality assurance can be addressed by calling out the relevant ASTM and other standards that need to be met as described previously. Project conditions and product storage should all be addressed in typical fashion. If large quantities of pre-blended mortar are anticipated, then delivery and protected storage will be important.
Part 2 - Products
All of the different performance and material criteria for the mortar(s) being specified need to be called out. This includes whether the mortar shall be pre-blended or site-mixed. The specific material listings following the ASTM and ANSI standards should be identified including any allowable admixtures. If pre-blended mortar is specified as the only acceptable product, then the type of mortar (standard, polymer-modified, or thin-set) needs to be called out. Further, any scratch coat, bond coat, or grout formulations should be identified including a reference to the types of locations where each is intended to be used (interior, exterior, special project conditions, etc.). Any related materials or accessories needed such as lath, flashing, screeds, etc. should either be specified in this spec section or be referenced in other relevant specification sections.
The details of each mix of mortar used in the project will need to be clearly identified in the specifications and coordinated with locations as shown on the drawings. If colors are selected for exposed mortars or grouts, then they need to be selected from manufacturers or industry data.
Part 3 - Execution
As with any site-installed product, the installation requires multiple steps which need to be clearly articulated in the specification in order to achieve the best results.
- Examination and Preparation: The importance of this step should always be stressed. In addition to the architect, the installer and general contractor or construction manager should review and examine the substrate for conditions that may affect the installation or the overall performance. This can include a determination that the wall does not vary more than ¼ inch from a true plan in a 10-foot span. It may also require the use of independent testing agencies to verify moisture content in a concrete or masonry structural wall. Any issues will need to be corrected, likely by the general contractor, if they are found to be out of compliance with the stated requirements.
- Installation: The recommendations and procedures outlined in this course based on the industry standards and manufacturer’s recommendations should always be the basis for a proper installation of adhered veneer products.
- Protection: Once installed and finished, the surface should likely be able to withstand use by remaining construction personnel on the project. However, the general contractor should be instructed to cover and protect the surface as appropriate to the jobsite conditions, particularly if the mortar and grout require any extended time to set and cure.
- Cleaning: Cleaning of any excess mortar should be done as part of the installation. Final cleaning and finishing should be based on the recommendations of the veneer manufacturer. Generally, harsh chemicals should be avoided for cleaning, such as acid, as should abrasive tools such as wire brushes or power washers.
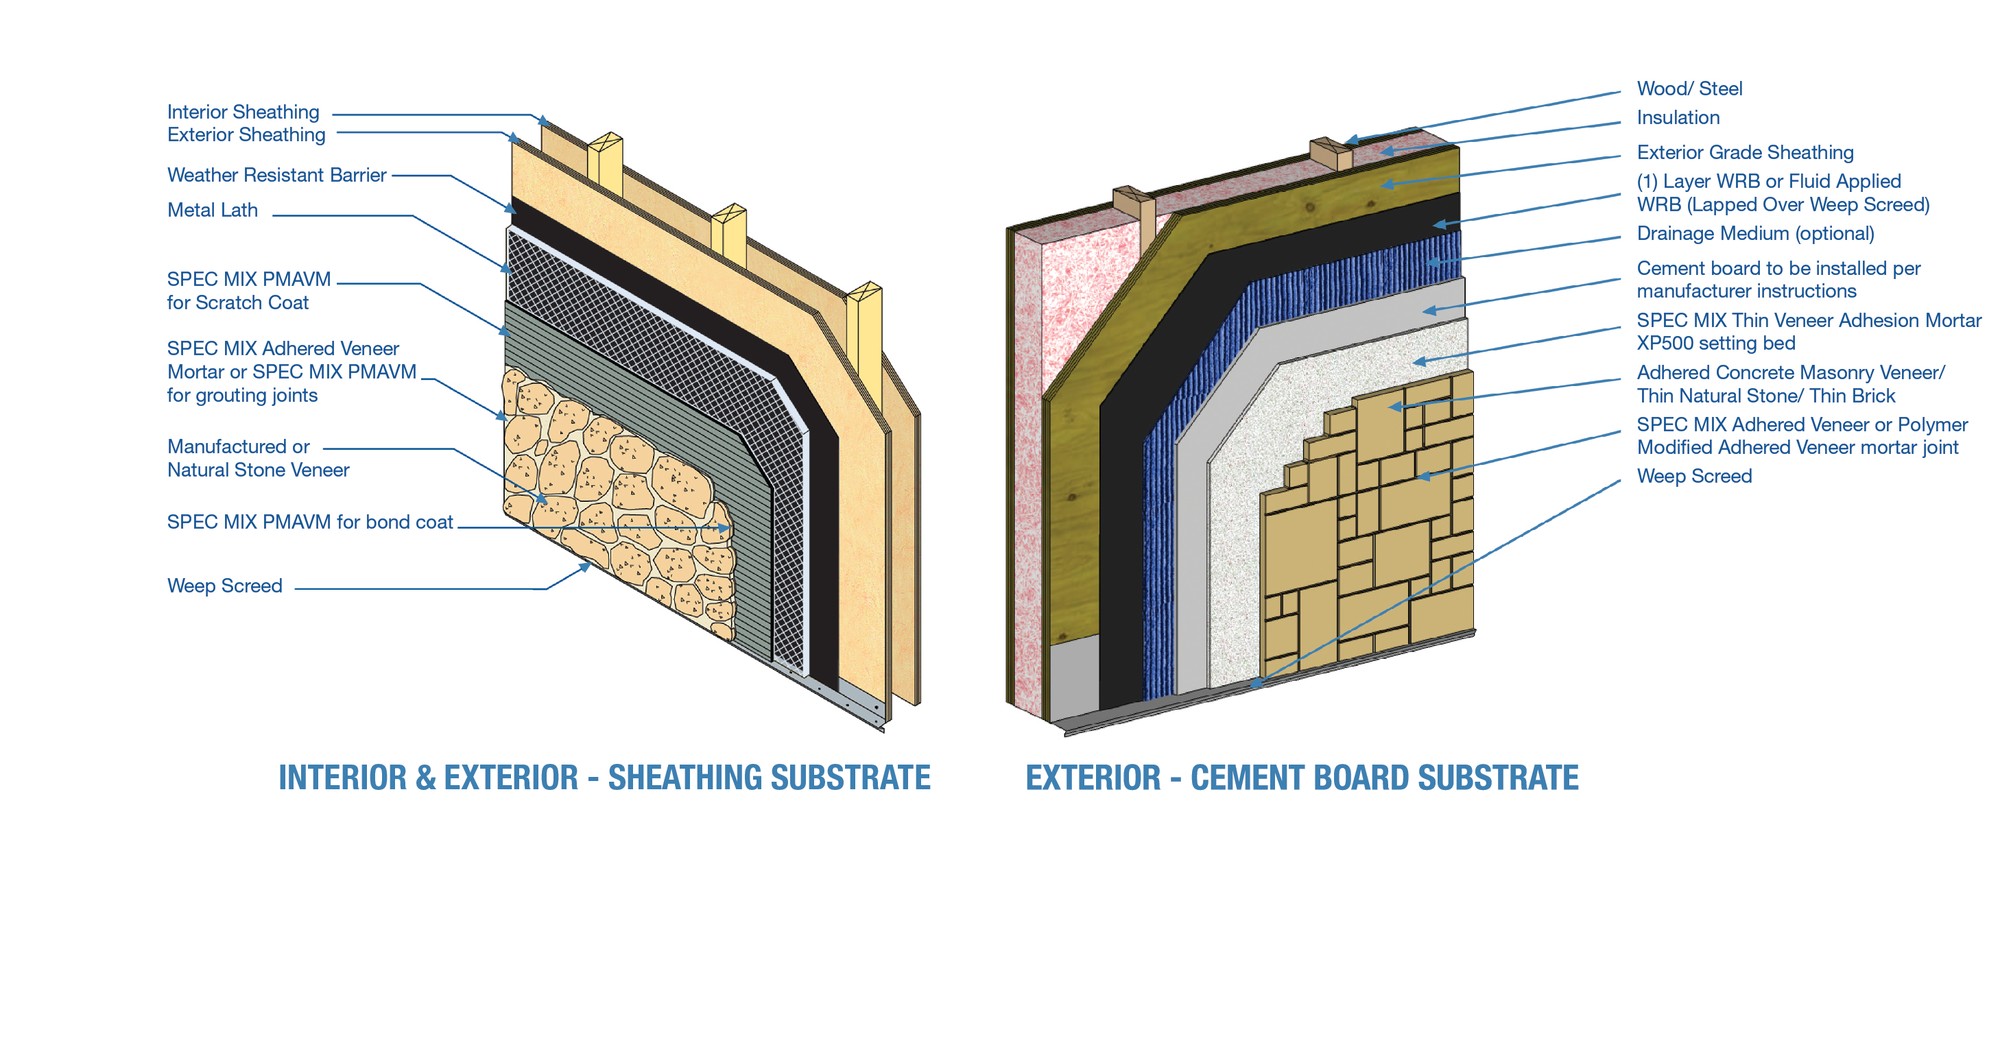
Photo courtesy of SPEC MIX and National Concrete Masonry Association (NCMA)
The proper installation of adhered veneers includes proper attention to the substrate such as a wood-framed wall, a concrete masonry unit (CMU) wall, or any other type of wall.

Photo courtesy of SPEC MIX
Proper specification of mortar materials consistent with the type of veneer products being installed helps to create the best design and construction results.
When specified and installed correctly, an adhered veneer system held in place with the correct mortar can readily provide the desired look and the long-term performance characteristics that are intended.
CONCLUSION
Adhered veneer systems have been shown to provide architects, interior designers, construction professionals, and building owners/managers with an appealing, long-lasting solution for interior and exterior walls and surfaces. They offer exceptional design versatility with a great range of thin but durable products available. The selection of the correct mortars and attention to detail regarding the design, specification, and installation of the system are key to a successful project.
Peter J. Arsenault, FAIA, NCARB, LEED AP is a nationally known architect and a prolific author advancing more sustainable buildings through the power of design. www.pjaarch.com, www.linkedin.com/in/pjaarch