Designing with Architectural Decorative Glass


Digital Printing with Ceramic Inks
This process takes the best attributes of the prior two processes. It is based on using ceramic ink that is applied directly to the glass surface using a machine similar to an inkjet printer. In this case, ceramic ink is applied and then fired onto the glass surface to make a more permanent bond. The size of a digital printer is larger than a flatbed printer, but there are still limits to the size of the graphics that can be placed. The process can be slower than some other processes since it is based on the speed of the inkjet moving across the glass. Nonetheless, there are some very positive attributes. These include the fact that the ceramic inks are UV-stable over time and tend to hold up well. The bonded ink makes it more suitable for architectural glass use since it is less likely to be damaged, with back printing of the glass still an option here, too. The visual resolution is also very good when using this process, although there may be some limits on the available colors that a printer like this can accommodate.
Images on Interlayers
For the best protection of an image and greatest versatility on content, a preferred approach is to print the image on material that can be laminated between two layers of glass. That glass can be annealed, heat strengthened, or tempered, and addressed like any other laminated glass product.
The first option is to use a photographic interlayer where a true photograph is the image printed on a film layer. That film with the image is then laminated between the glass. This process has the benefits of providing true photographic imagery consistent with the quality and resolution of the photograph. As such, things like color saturation and resolution detail can be very high and produce very satisfying results. Since different photographs can be used for different laminations, there is great flexibility in design allowing for images that don’t need to be repeated. This photographic process has some size limits restricting the width to less than five feet (approximately 57 inches). It is also recommended for interior use only.
The second option for putting an image in the middle of laminated glass is to print it directly onto a PVB interlayer using an inkjet printer with or without white and color. The printed PVB is then bonded between the glass layers in standard laminated glass style. This approach allows for larger image widths (up to 96 inches) and can be used both indoors and outdoors. It has good resolution detail, but there are some limits on certain color saturations (i.e., vibrant reds and true blacks). Regardless, it is a very versatile approach that allows for total flexibility in design for repeating or non-repeating patterns in small or large quantity production. If multiple interlayers are present (i.e., three or more layers of glass), then multi-layering of the images is possible, or the image can be combined with a diffuse layer for more interesting effects. Since the materials are standard for laminated glass, this process can be used with any glass type, as part of an insulated glazing unit or in any other common glass lamination application.
CONCLUSION
Architectural glass serves many purposes. Starting with any one of three manufactured products, glass fabricators can create standard and custom products that are functional, decorative, protective, and safety conscious to suit individual project designs. Working with a fabricator during the design process helps building designs become realized and that consider the full range of possibilities and options while meeting cost and performance objectives.
Coated Glass Project Example
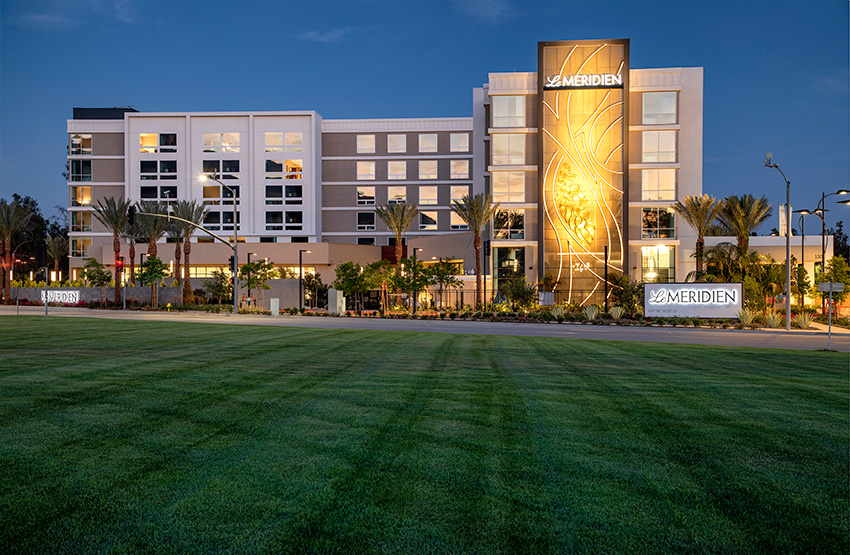
Project: Le Méridien Pasadena Arcadia
Location: Arcadia, California
Architects: AO Architects
Photography: Courtesy of AO; photography by Jim Bartsch
The Project: The Le Méridien Pasadena Arcadia is a four-star hotel that combines modernist features with Art Deco elements in its design. Inspired by the nearby Santa Anita racetrack, the facade of the building incorporates gold-colored coated glass elements that glow at night against the stunning San Gabriel Mountains. The hotel’s ground floor is made of vision units that combine gold-colored glass with a high-performance low-e glass.
The Glass: The gold coating has a futuristic composition that is both appealing to the eye and efficient in its performance. The transparent material adds a unique reflective, metallic aesthetic to the facade while reducing solar heat gain. Additionally, it allows those inside the lobby bar to view the beautiful grounds outside, while the solid gold upper panels hide the structure behind them.
Glass Surface Treatment
Separate from printing images onto or between glass surfaces, it has also been common to create an image by etching the surface of the glass. Artistic, decorative, and informational images have been routinely created this way which include logos, signage, and visual aid assistance.
The etching process can be done any of three common ways. First is acid etching, which relies on a chemical process of acid, removing a portion of the surface of the glass and creating a rougher, unpolished surface. The placement of the acid is very controlled, using a pattern or covering that only allows the etching to occur where intended and thus creates the desired design. A similar approach is to use focused sandblasting to roughen up the surface of the glass either in a prescribed pattern or across the entire glass pane for a diffused light effect. For very precise patterns, images, or other markings, laser etching can be used which simply uses a guided laser to remove a small part of the surface of the glass. Any of these techniques can be used to create a translucent image that will be a durable, permanent mark in the glass. That makes them suitable for indoor applications, such as partitions and doors, or outdoor features, such as exterior murals, sculptures, and walkways.
Bent Glass Project Example
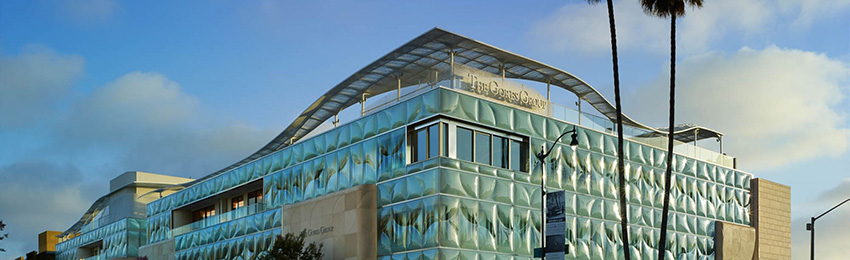
Project: The Gores Group Building
Location: Beverly Hills, California
Architects: Belzberg Architects Group
Photography: Courtesy of Pulp Studio
The Project: An existing three-story building in Beverly Hills, Calif., was transformed by Belzberg Architects into the stunning new workspaces for The Gores Group, a global private equity firm. The glass facade is one of its distinctive attributes.
The Glass: Prominently situated in the heart of Beverly Hills, this intriguing glass facade consists of a PVB substrate sandwiched between slabs of slumped glass. The substrate in this instance is printed with a pattern that accentuates the curves of the glass, filters the view, provides privacy, and improves the natural light while the thickness of the panels reduces sound and vibration from the busy street. The shape, thickness, curvature, and pattern of the panels can be customized for indoor or outdoor use in sizes up to 96 by 180 inches and has the advantage of superior sustainability in exteriors over other products in the market.
Notice